VESC Calibration
Step-by-step guide to configure, flash, and test your VESC motor controller, including setup with the VESC Tool and Python scripting via pyvesc.
Use the table of contents on the right to navigate this page. You can also use the mobile menu to access the navigation.
1. Introduction
The VESC (Vedder Electronic Speed Controller) is an open-source motor controller for electric vehicles and robotics. Calibration ensures precise sensor readings, smooth motor performance, and system optimization.
2. Required Tools and Software
- The VESC included in your educational kit
- A micro-USB cable
- A computer (Windows, macOS, or Linux)
- The VESC Tool (free version available at https://vesc-project.com/)
3. Configuration
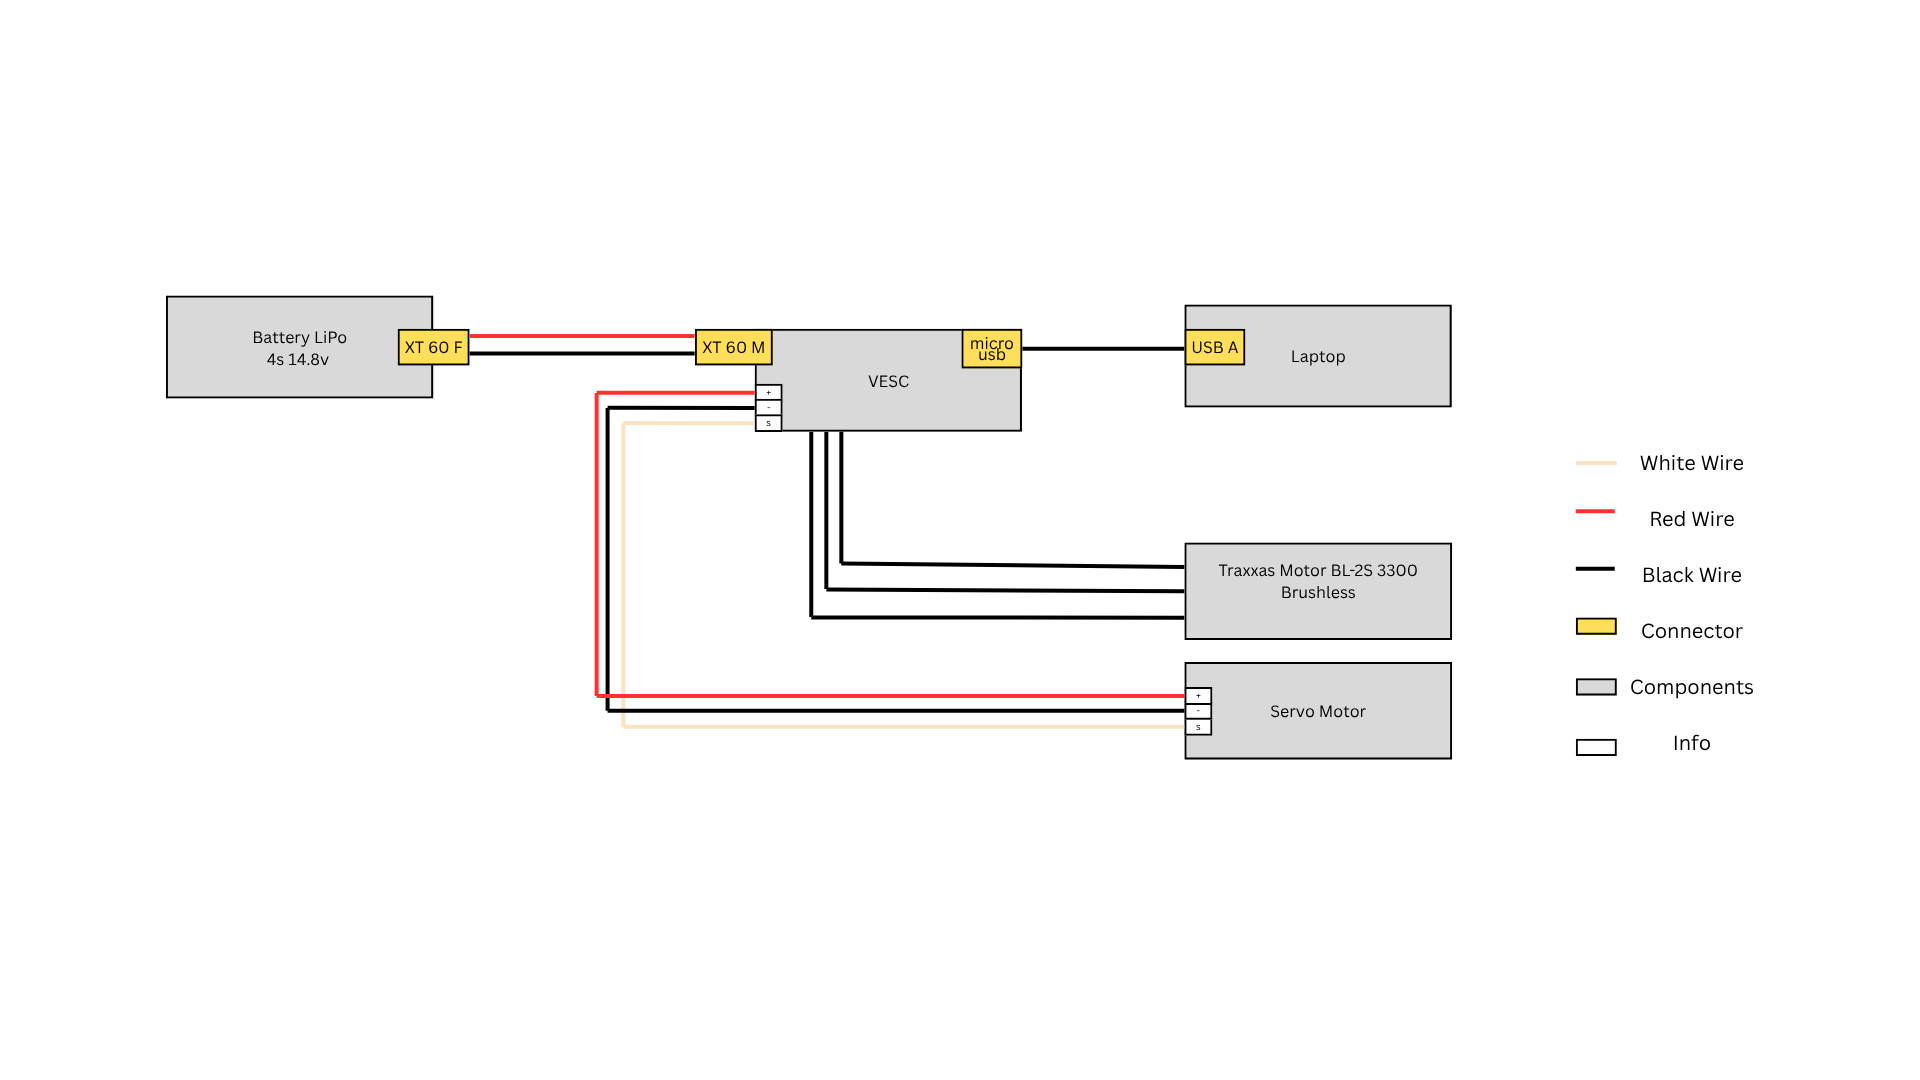
3.1 Hardware Setup
-
Power Connection Connect the VESC to the 4S LiPo battery provided in the kit using the XT60 (or compatible) connector. Double-check polarity before connecting to avoid damage.
-
Motor Connection Connect the BLDC motor (already mounted on the Traxxas chassis) to the three-phase output wires of the VESC. The order of these wires doesn’t matter initially; it can be corrected later via motor detection.
-
Servo Motor Connection Plug the servo motor into the PWM output of the VESC.
-
USB Connection Use the provided USB cable to connect the VESC to your laptop. This connection allows you to configure and flash the VESC using the VESC Tool.
Diagram:
3.2 VESC Tool Setup
3.2.1 VESC Serial Connection
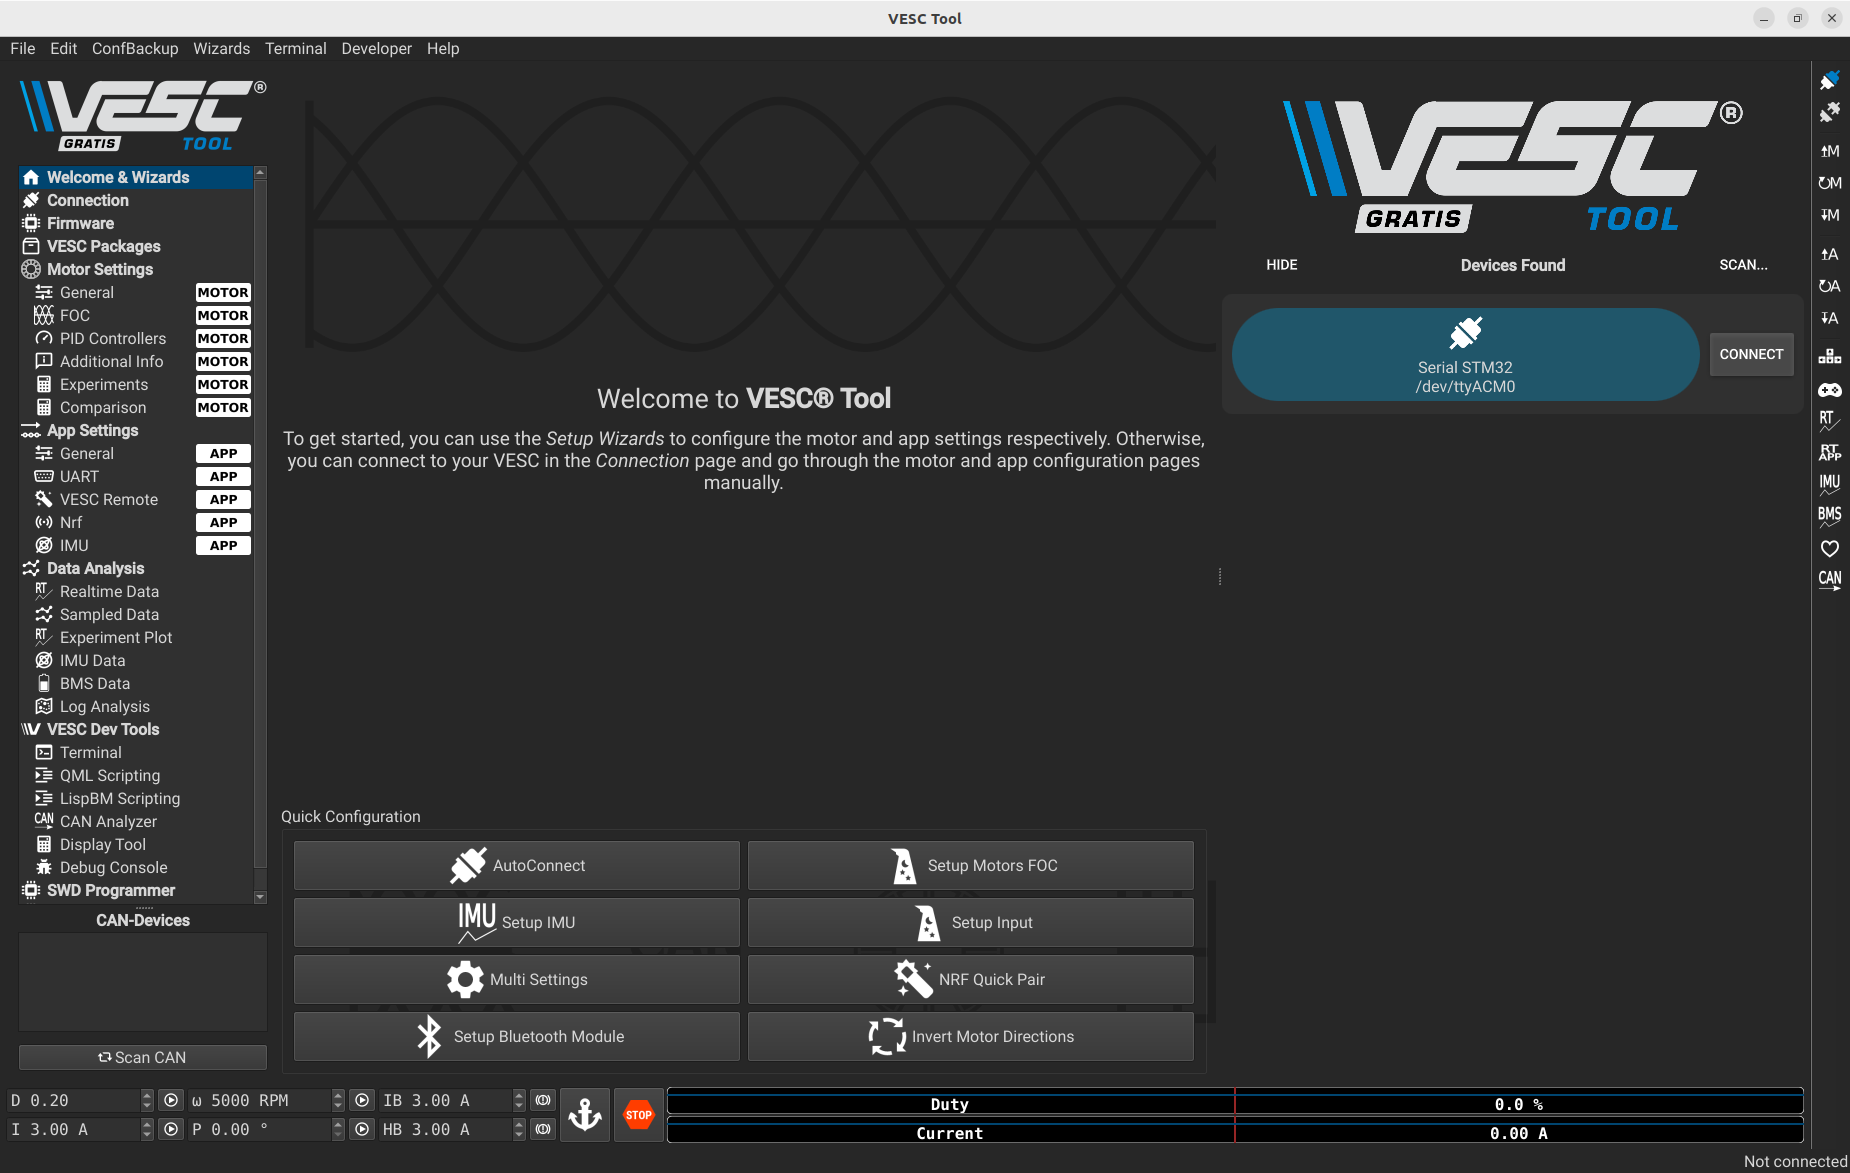
- Open the VESC Tool Locate and open the VESC Tool software you installed earlier on your computer with hardware setup connected to your laptop. When you first open the VESC Tool, you will be prompted to accept the Terms and Conditions (CGU). Make sure to read and accept them to proceed to the main interface.
-
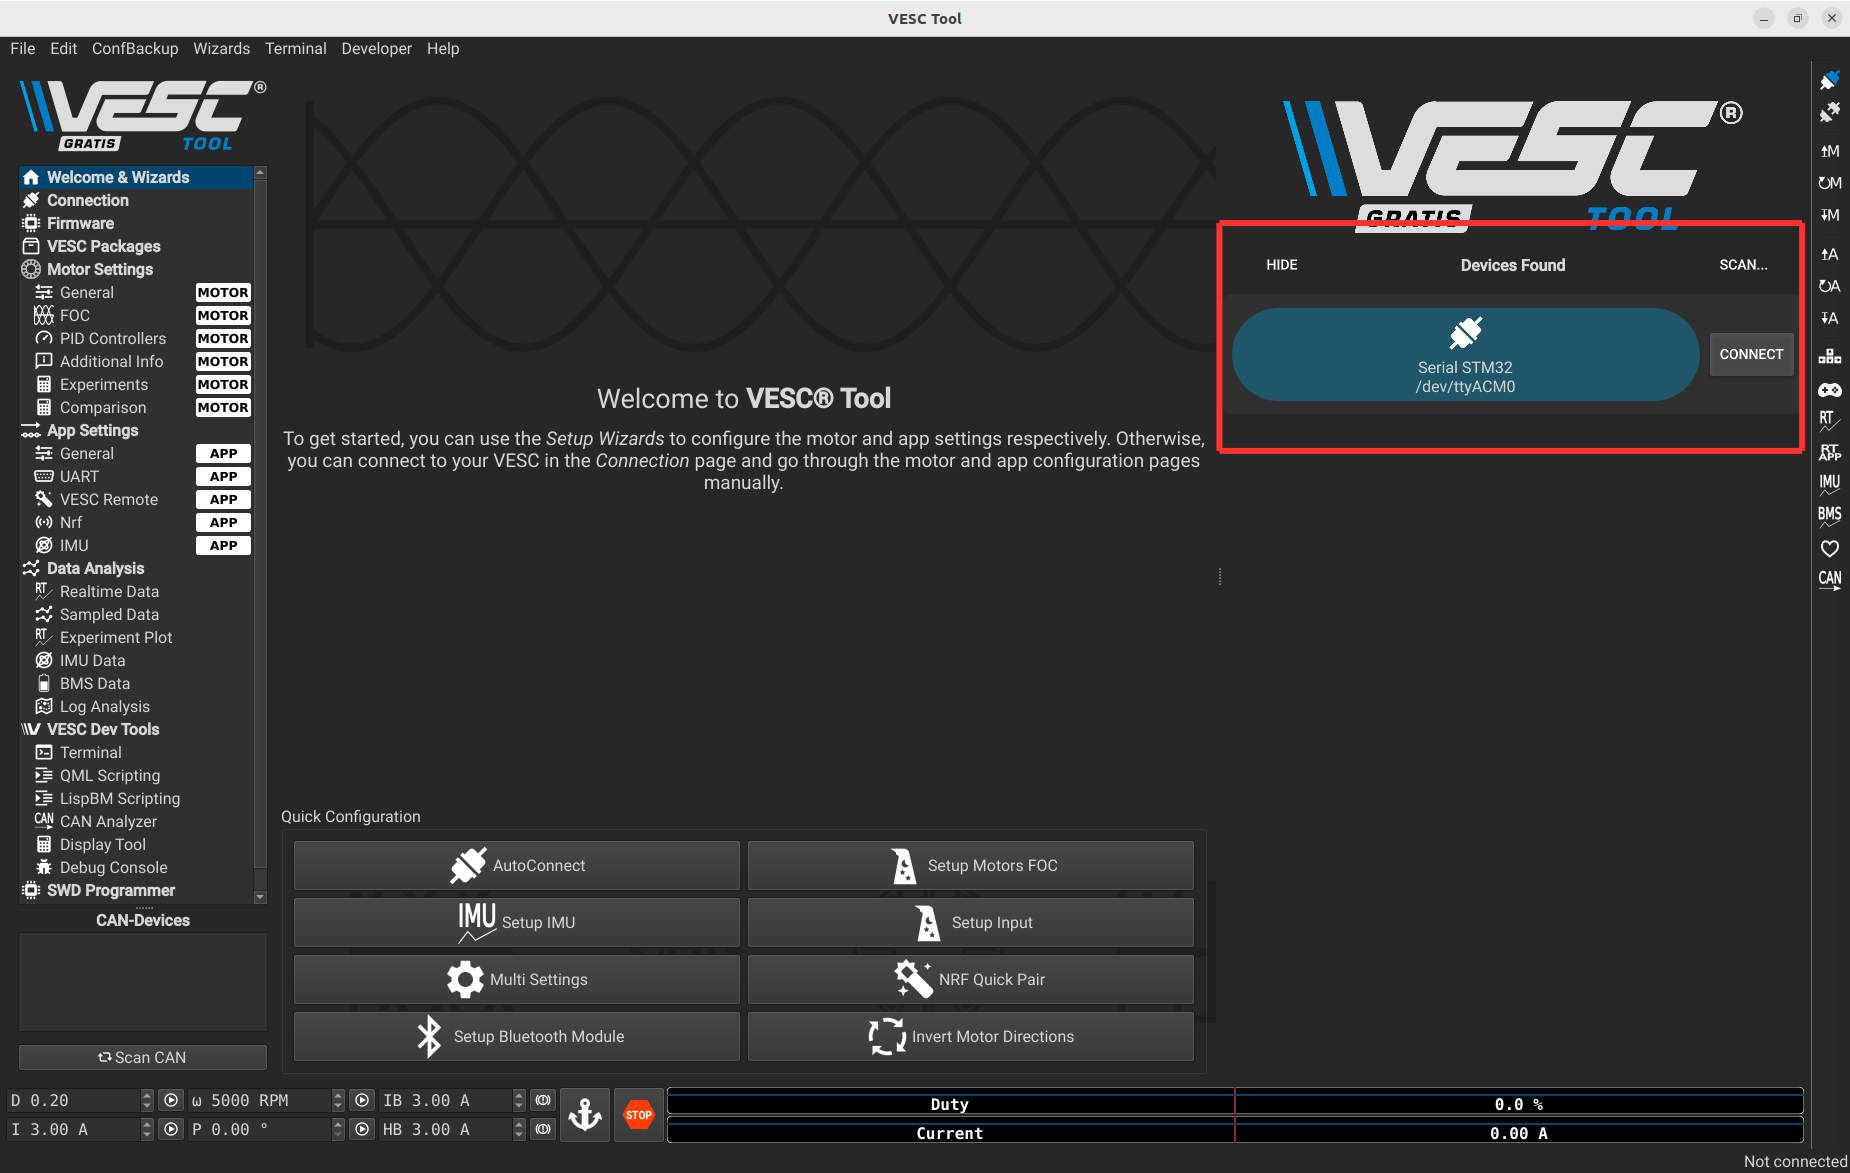
Connect to the Listed VESC Device Once the VESC Tool is open, select your VESC device from the list to establish a connection. This allows the software to communicate directly with your hardware for flashing and configuration.
Note for Linux users: You may need to add your user to the
dialoutgroup to enable USB access. The VESC Tool may prompt you to enter your password, and a system restart is required for the changes to take effect.
If a firmware update is available, a pop-up like the one below will appear.
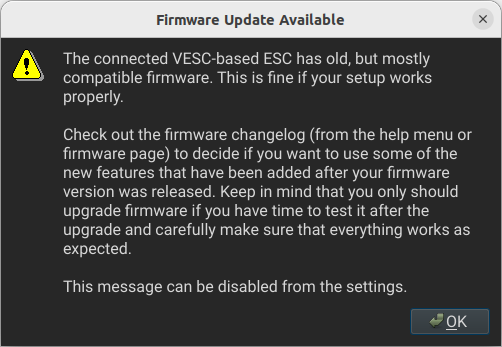
3.2.2 Firmware Update
This step is optional and only needed if the firmware update message appears during connection.
Click the icons shown below to open the Firmware Manager window.
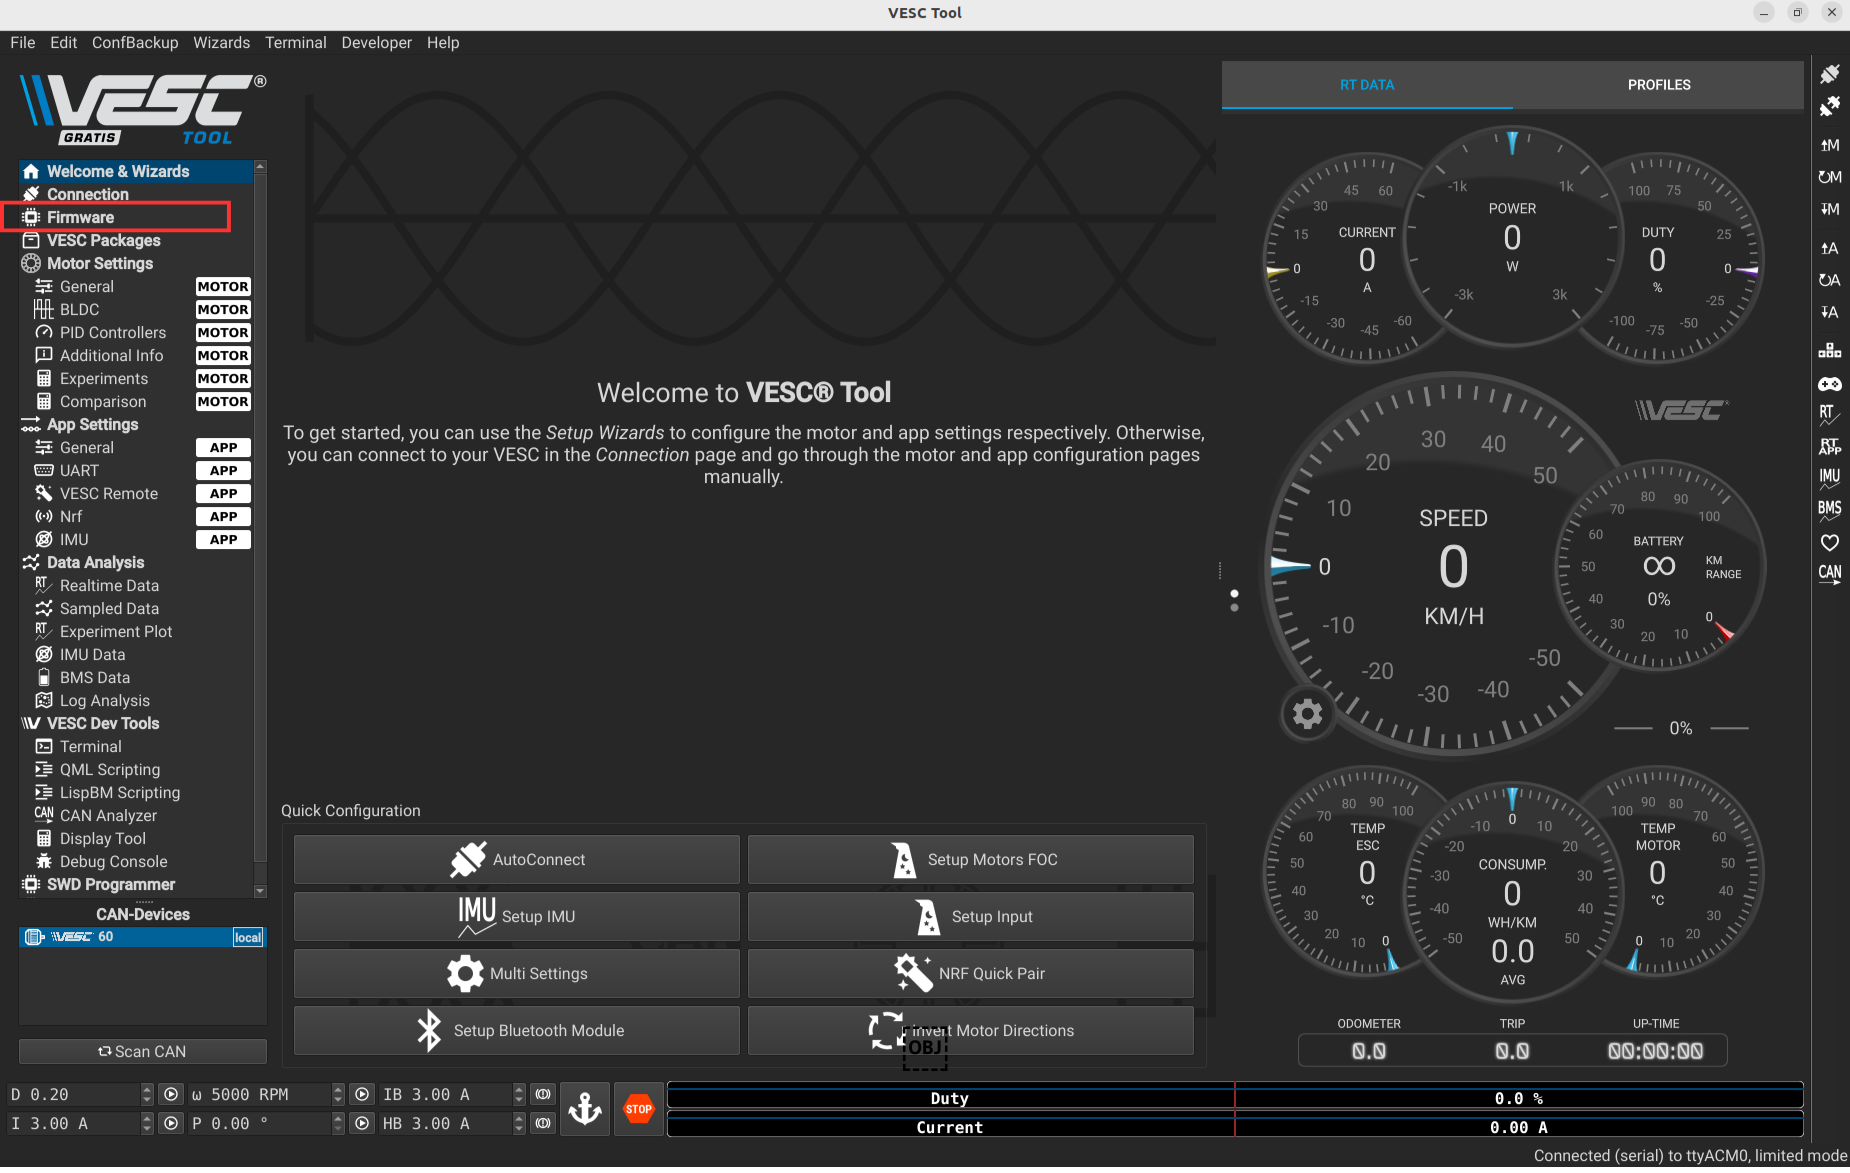
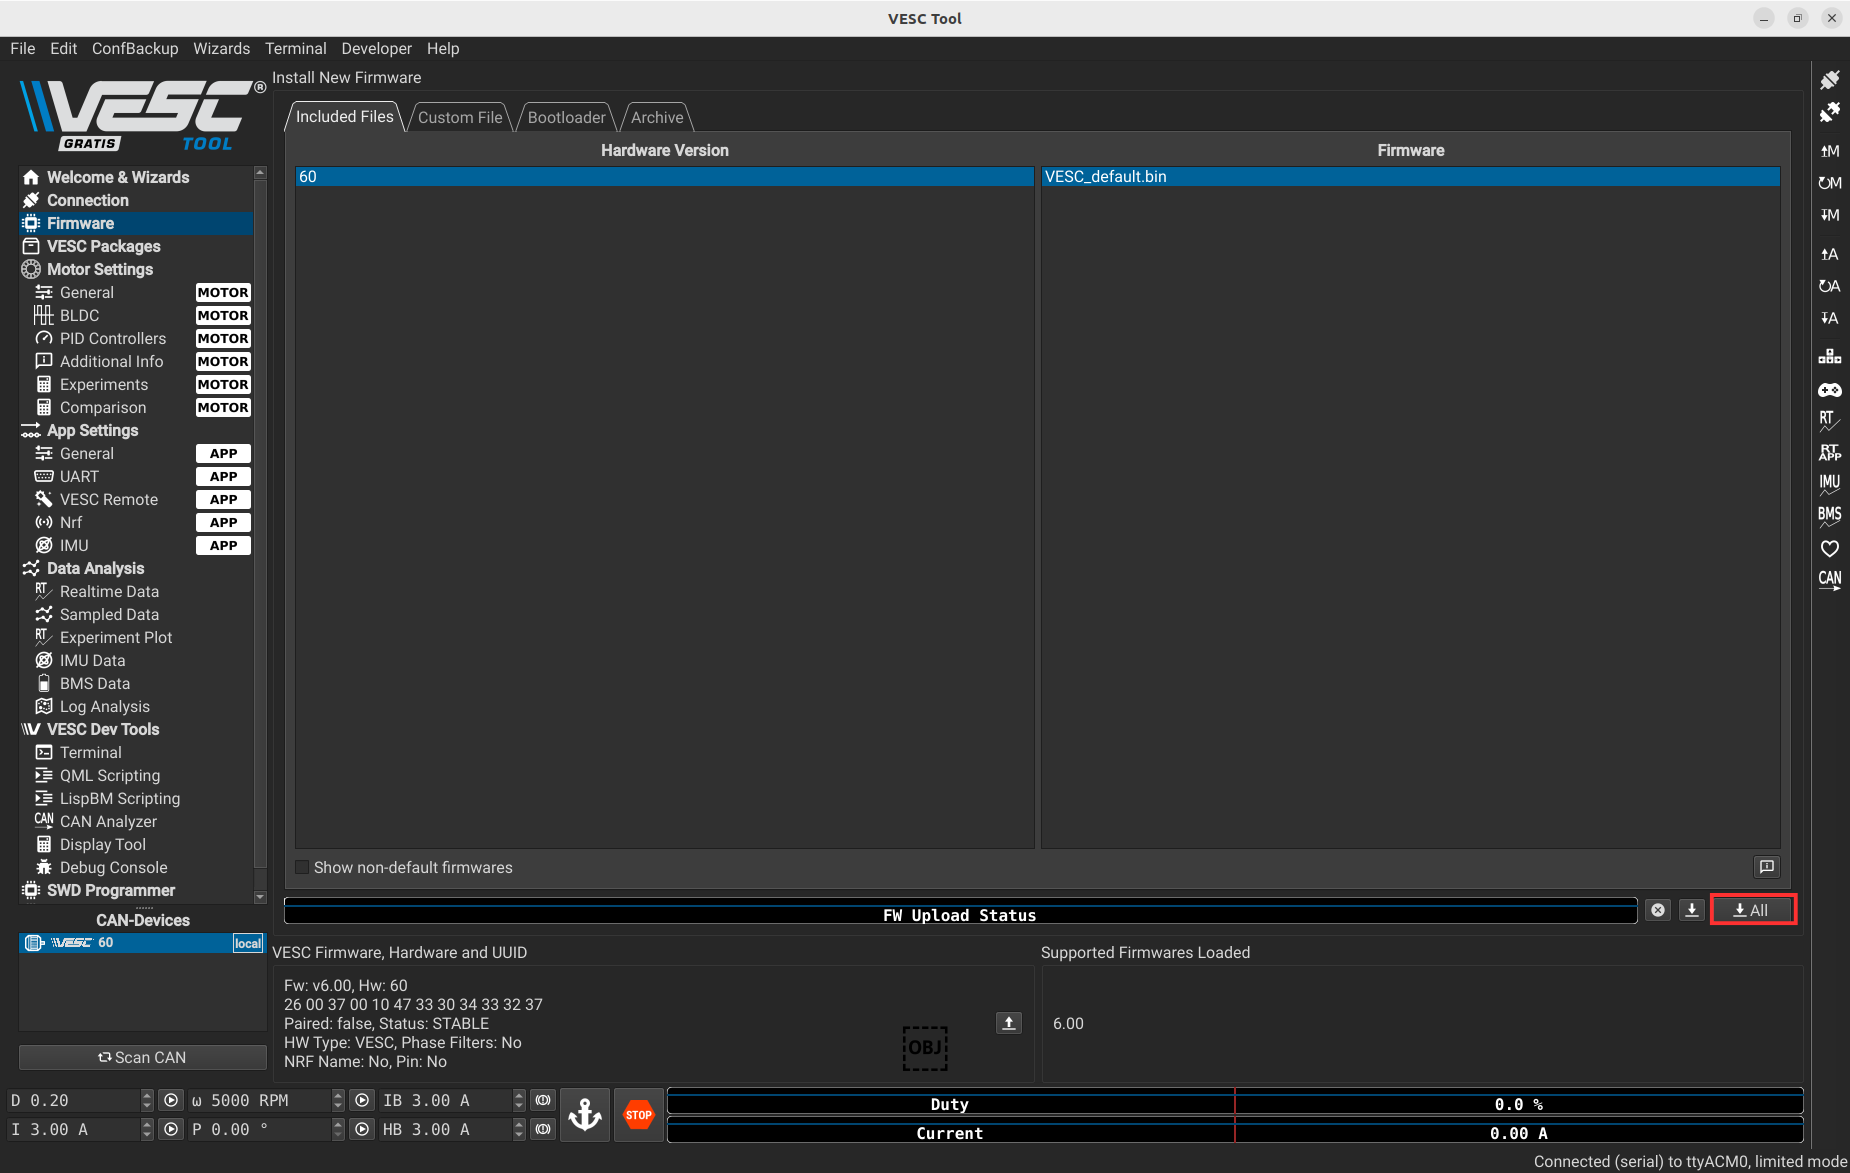
Here is what you will see after clicking on the firmware icon.

To update the firmware, you have to press the following button,
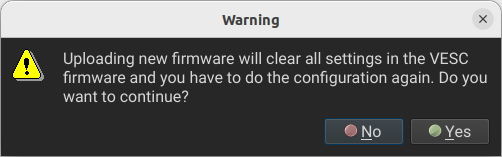
Then press Yes.
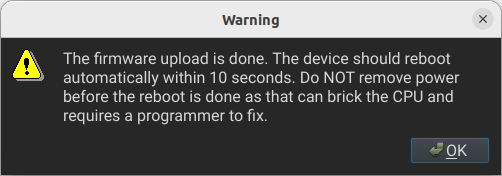
After waiting a few minutes, this message will appear, and your new firmware will be uploaded.
3.2.3 Motor Setup
The next step is to setup the motor. You have to go back to the main page and connect to the VESC again, because the firmware update restarts the VESC.
To setup the motor, you need to press the following button.
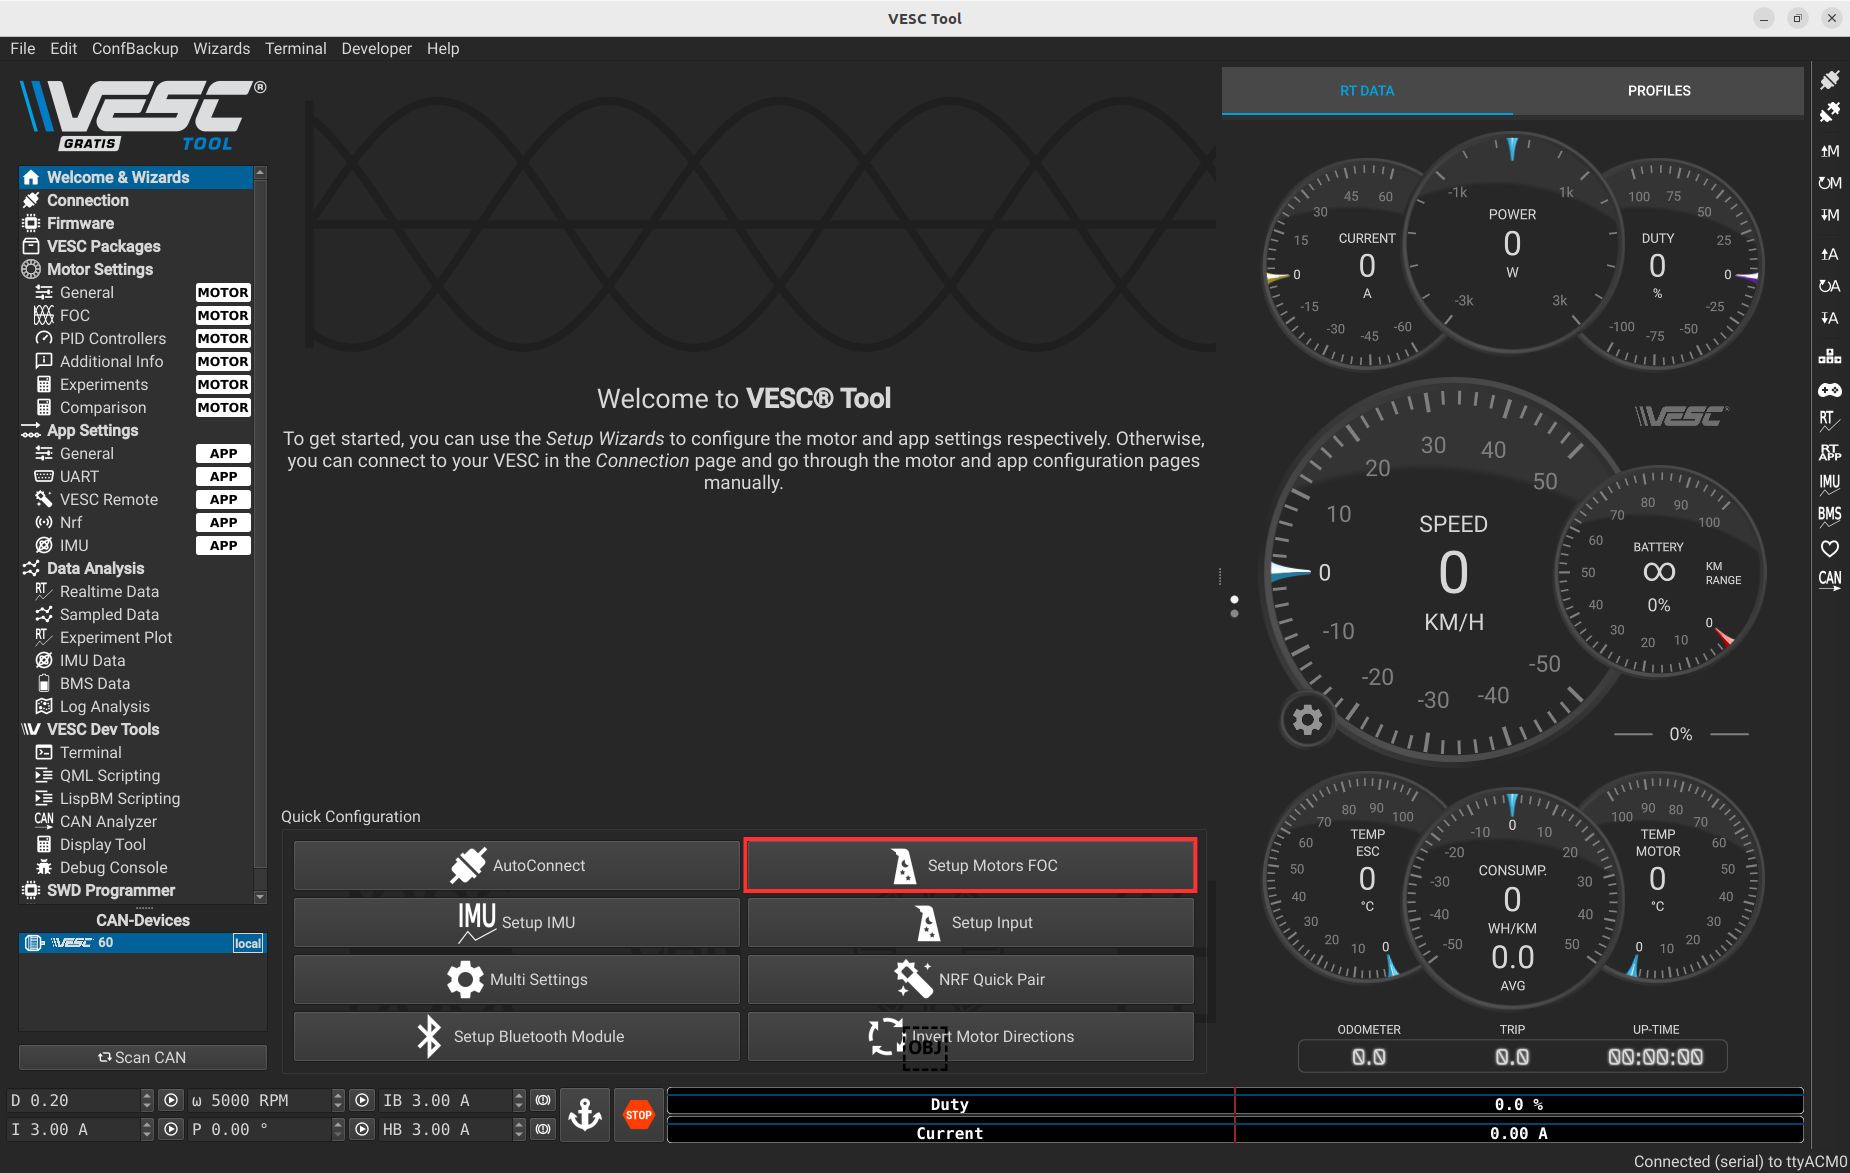
Then press Yes.
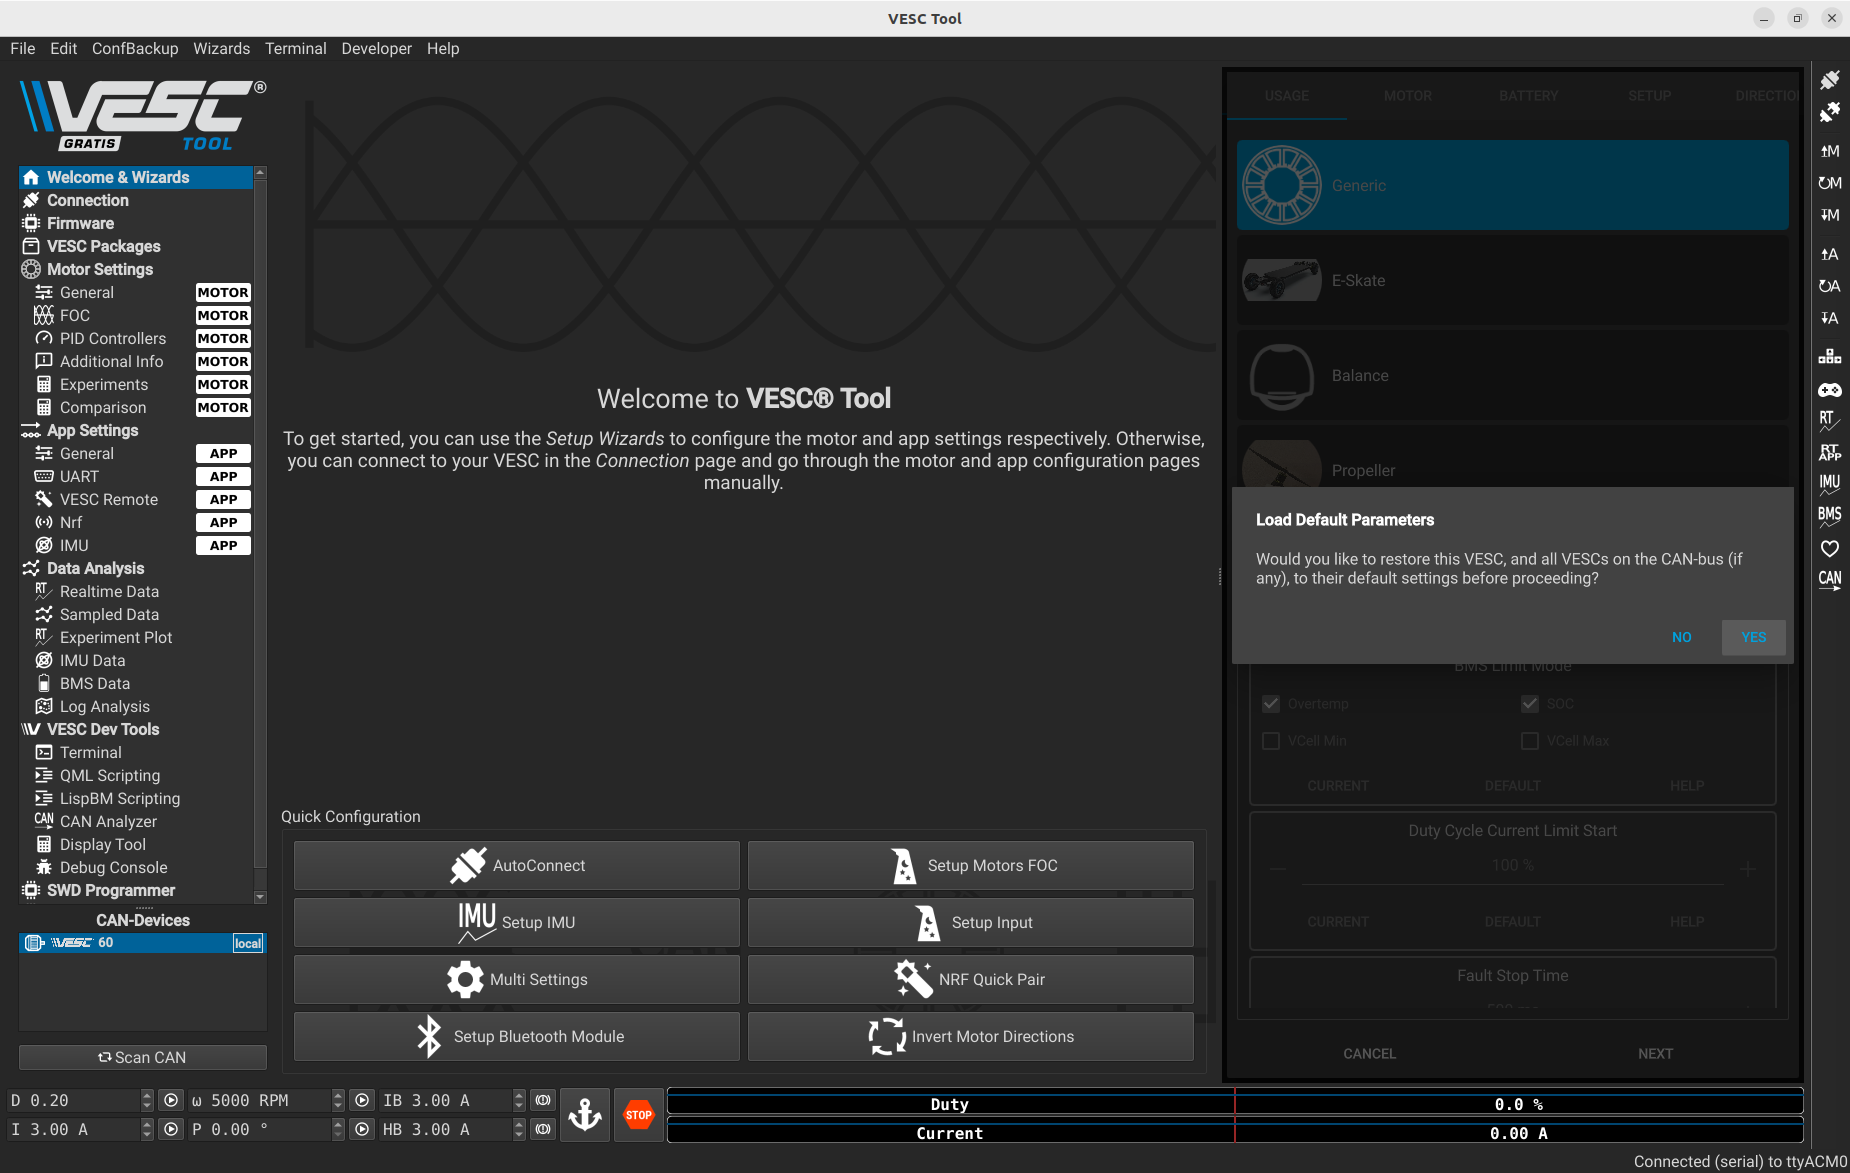
Then Next.
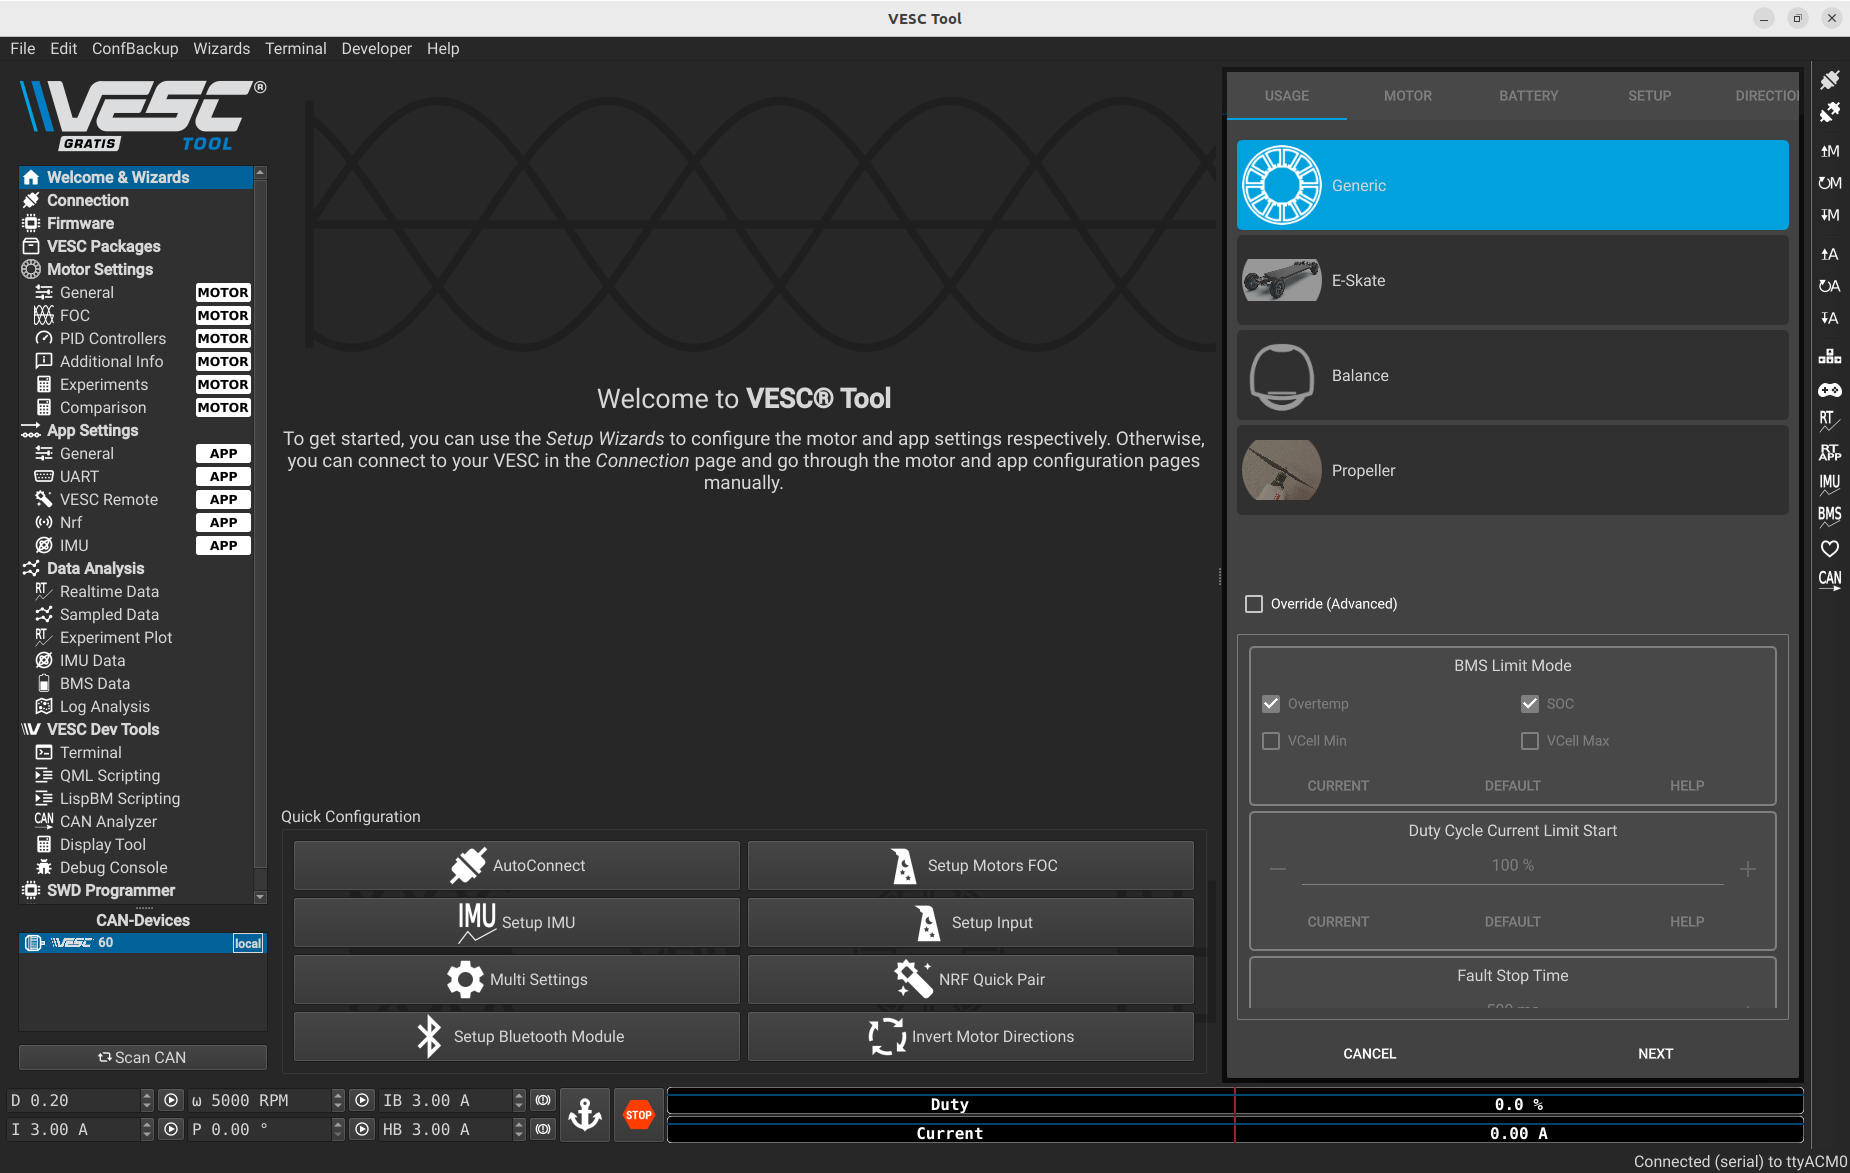
Select the third option.

Then fill in the relevant information about your battery. Below are the details for the battery included in the kit.
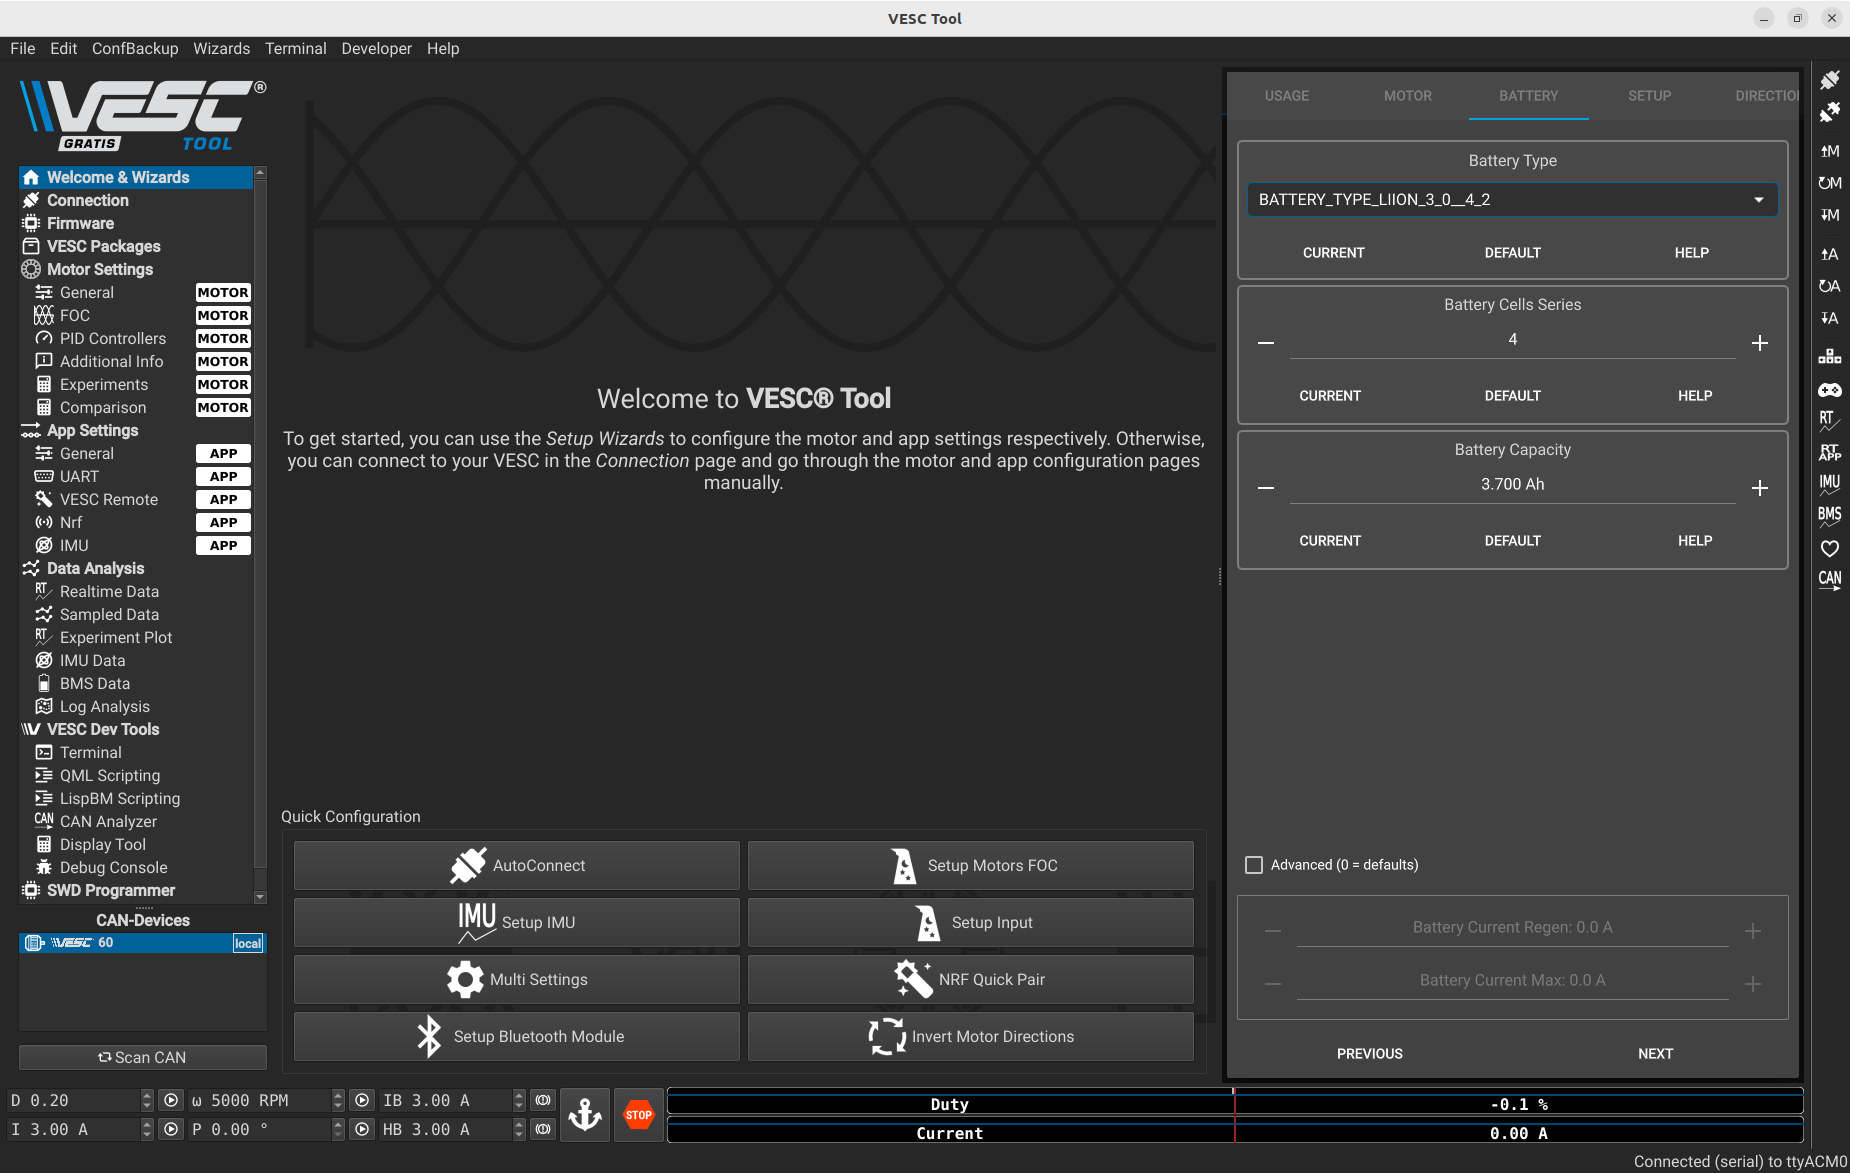
Once you validate the battery info, you will see this pop-up.
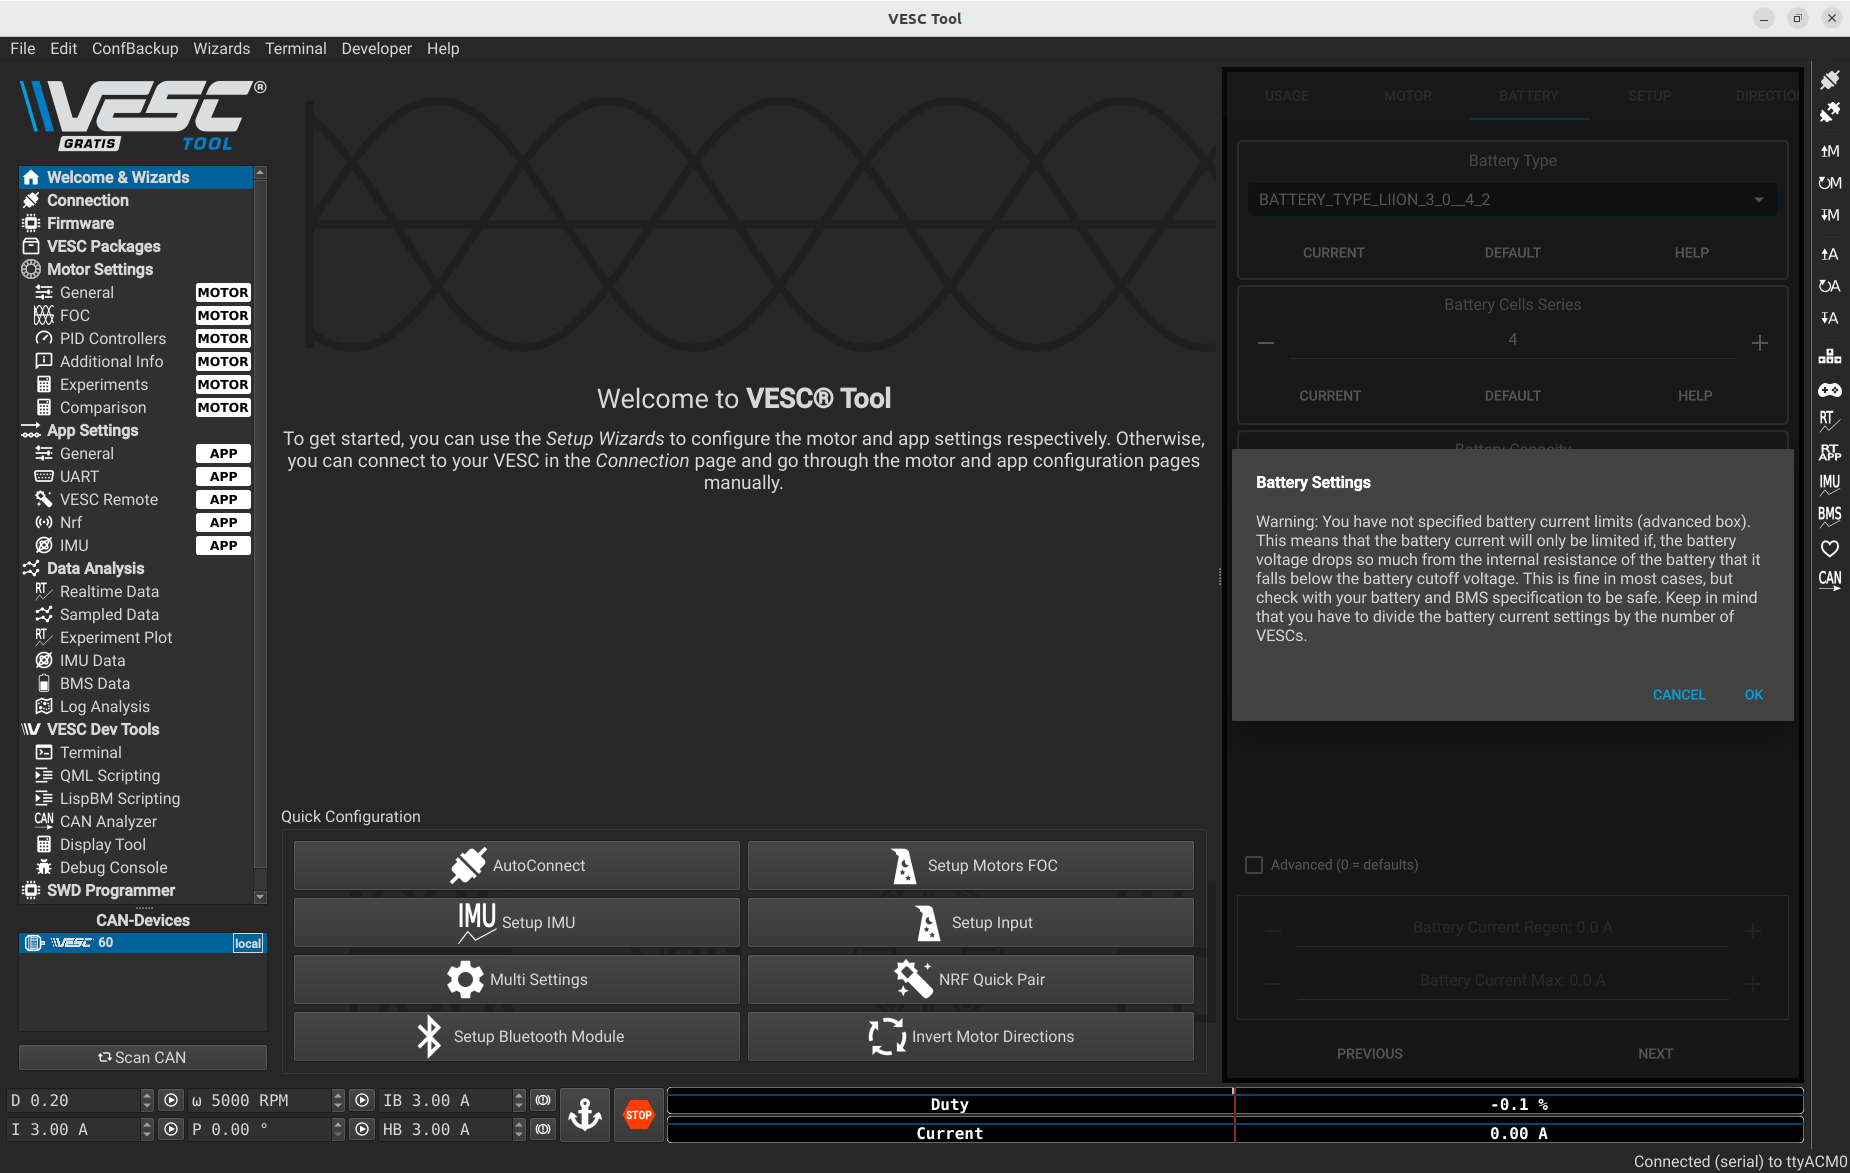
You can press OK if you entered the correct information.
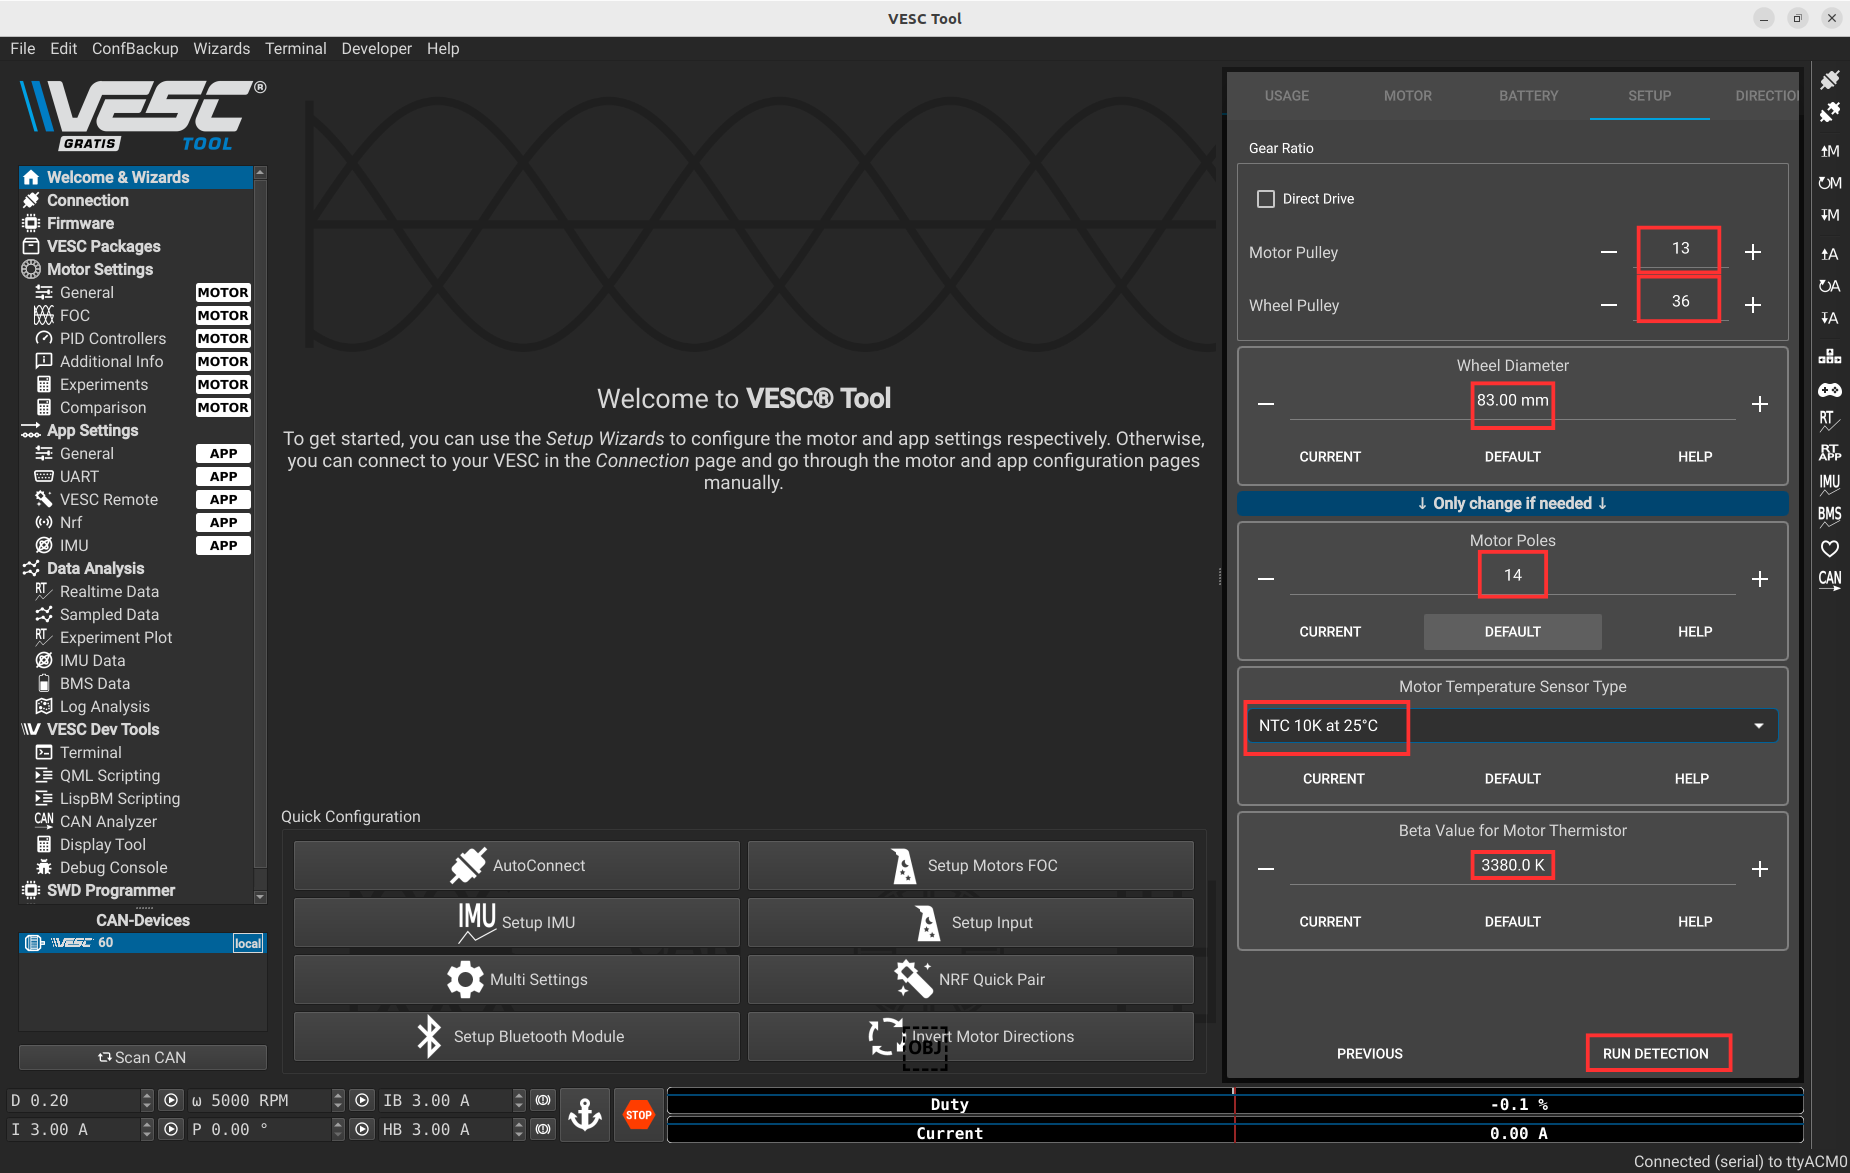
Enter the motor information as shown below.
⚠️ Before continuing, make sure the car is placed on the provided stand and that the wheels are not touching the ground or any obstacles. The motor will spin during the process.
Then press RUN DETECTION.
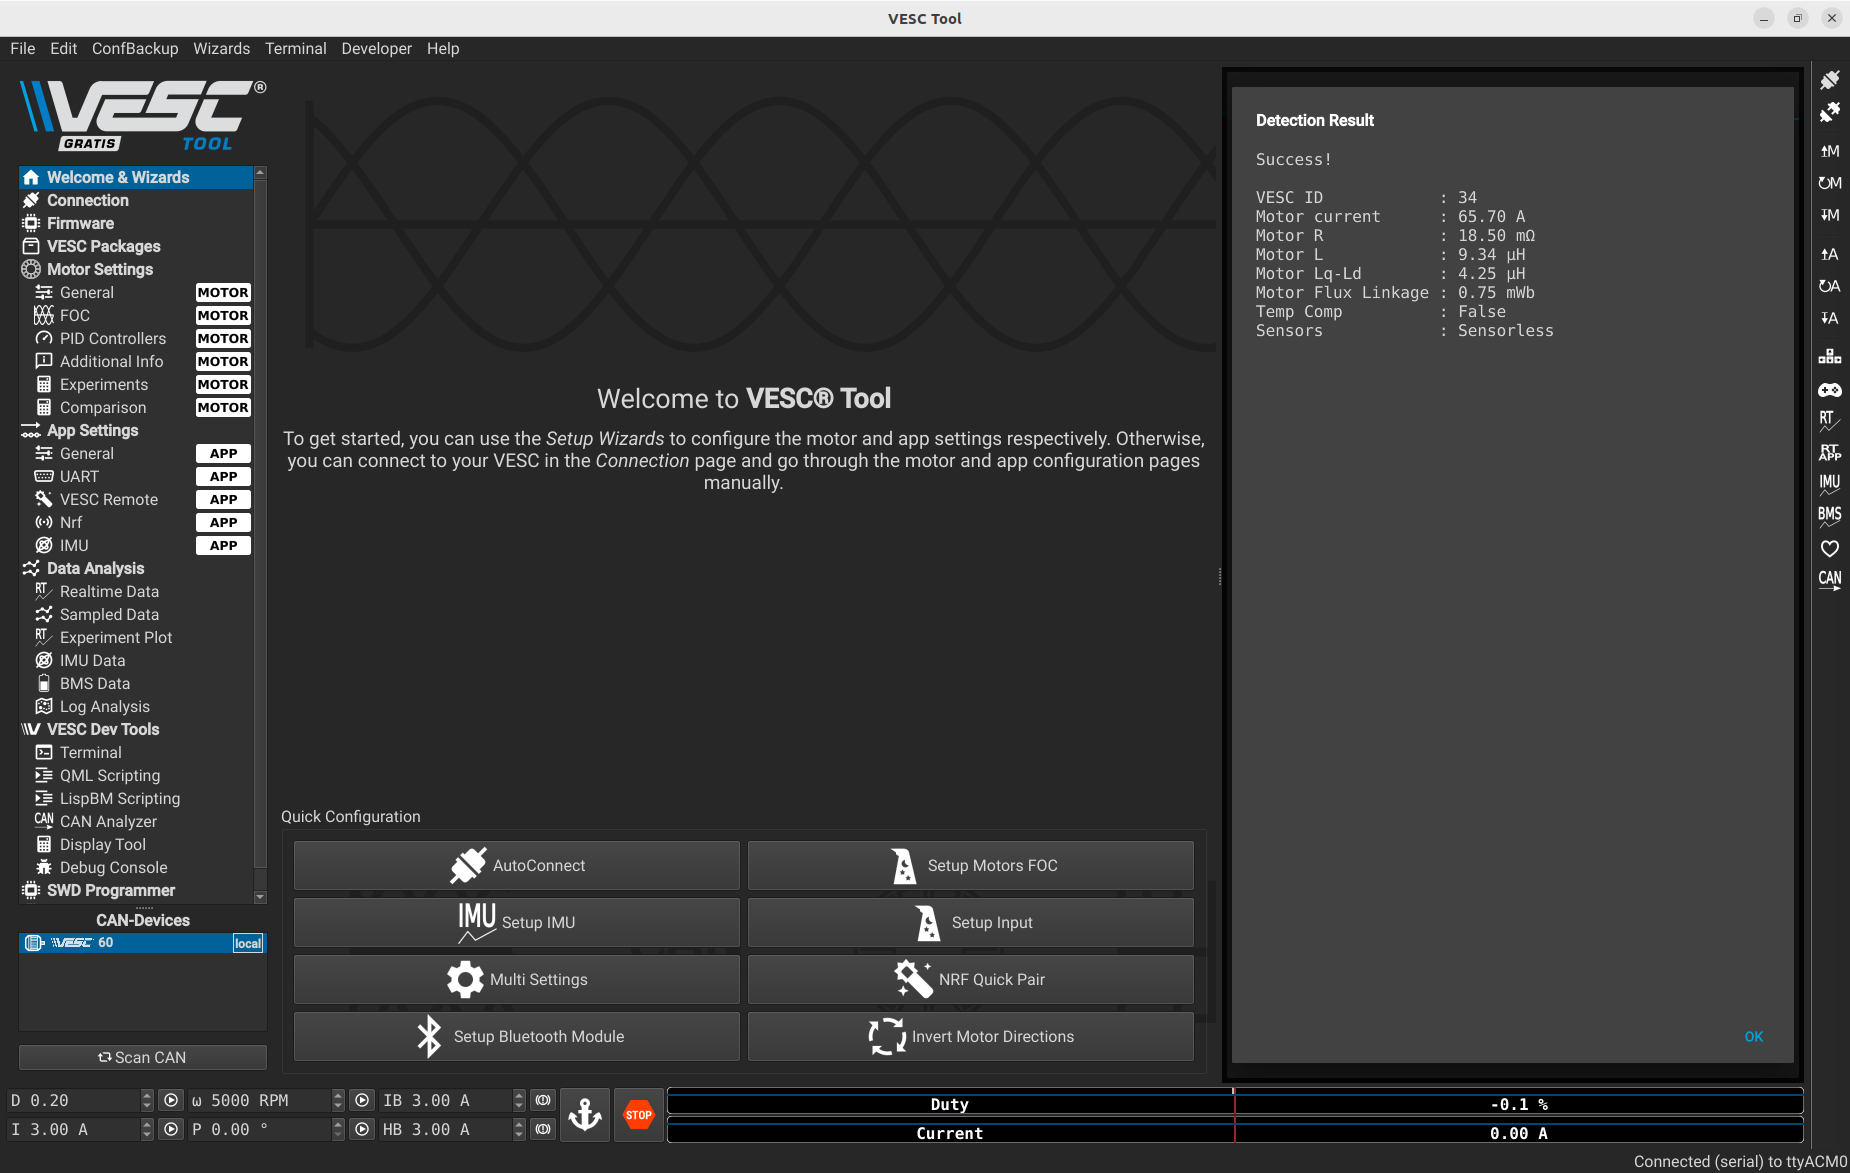
After 30 seconds this message will appear saying the motor successfully spins.
Next, go to Motor Settings > General and select BLDC instead of FOC.
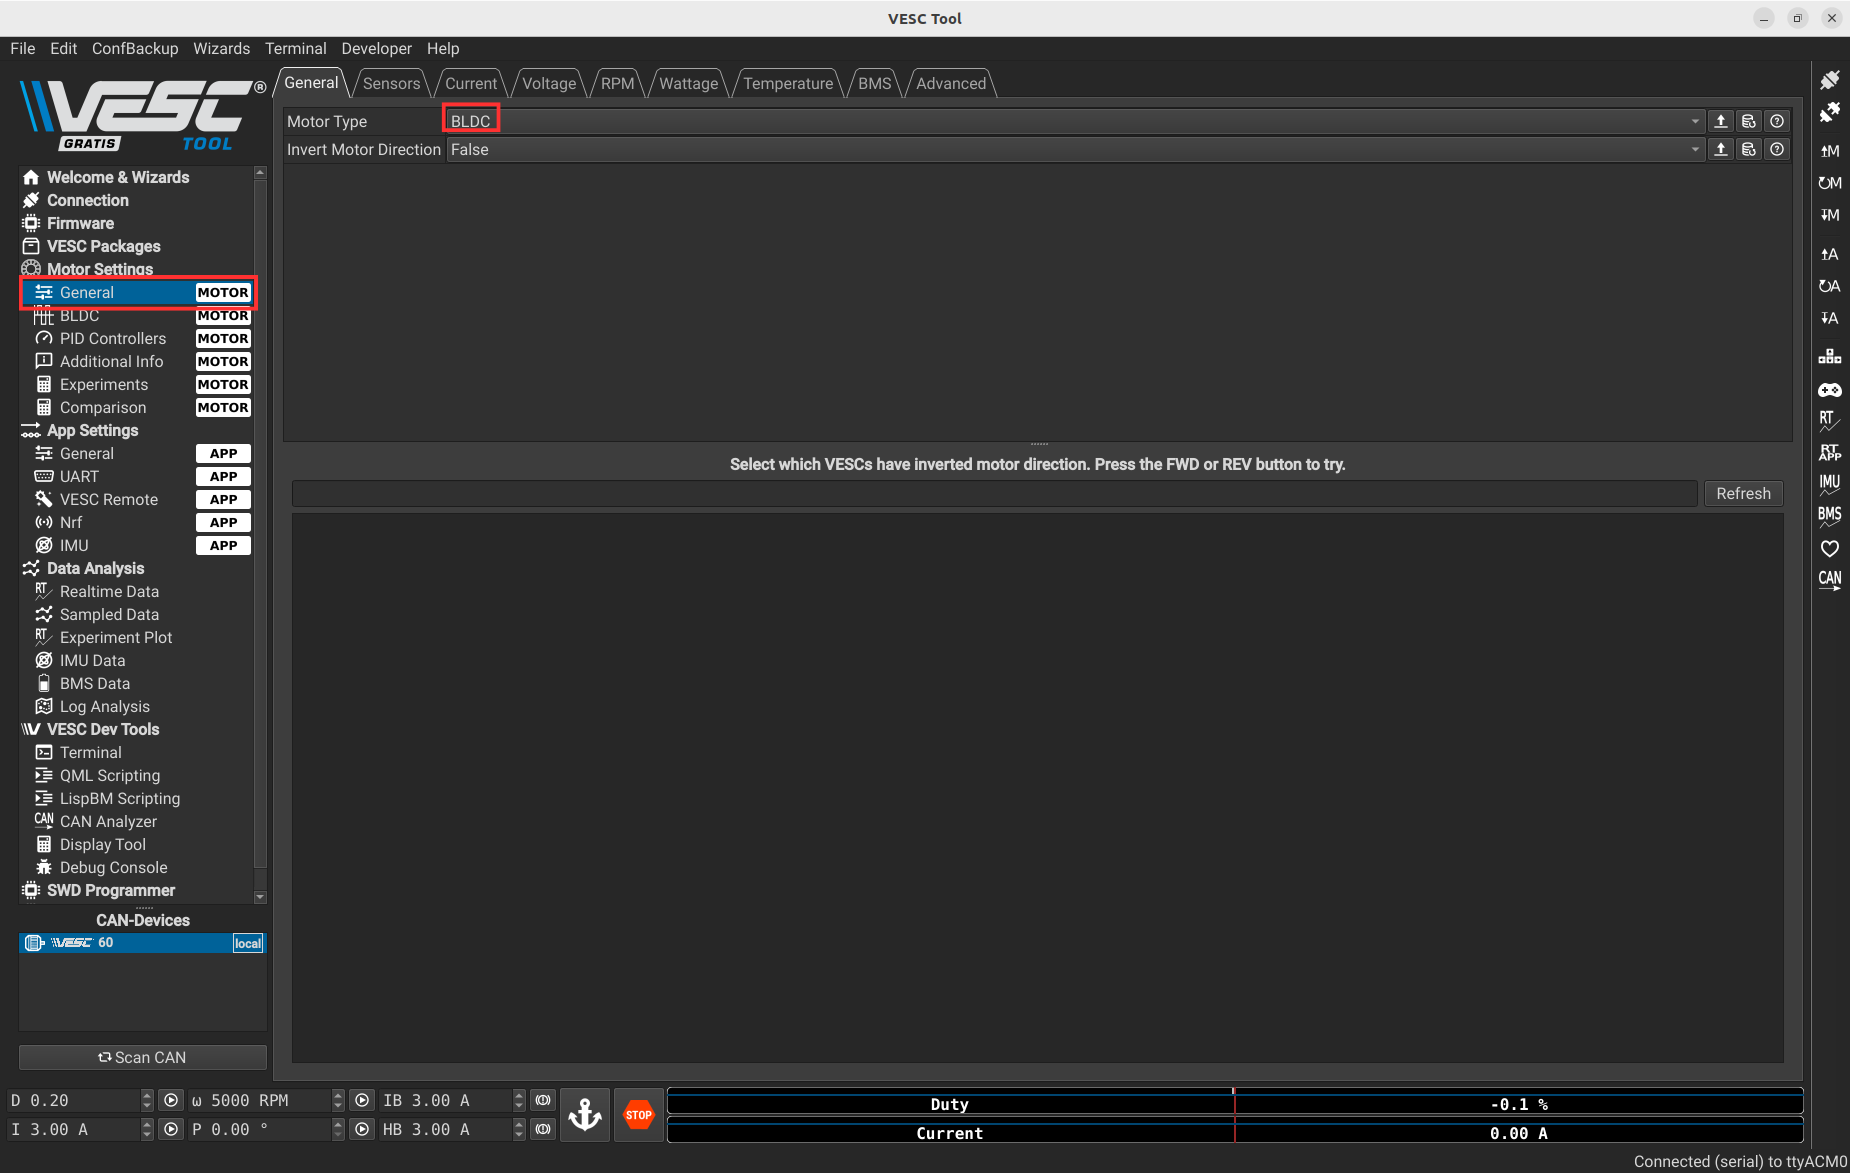
To finish, you can press the following button to write all your previous configurations on the VESC.
3.2.4 Motor Test
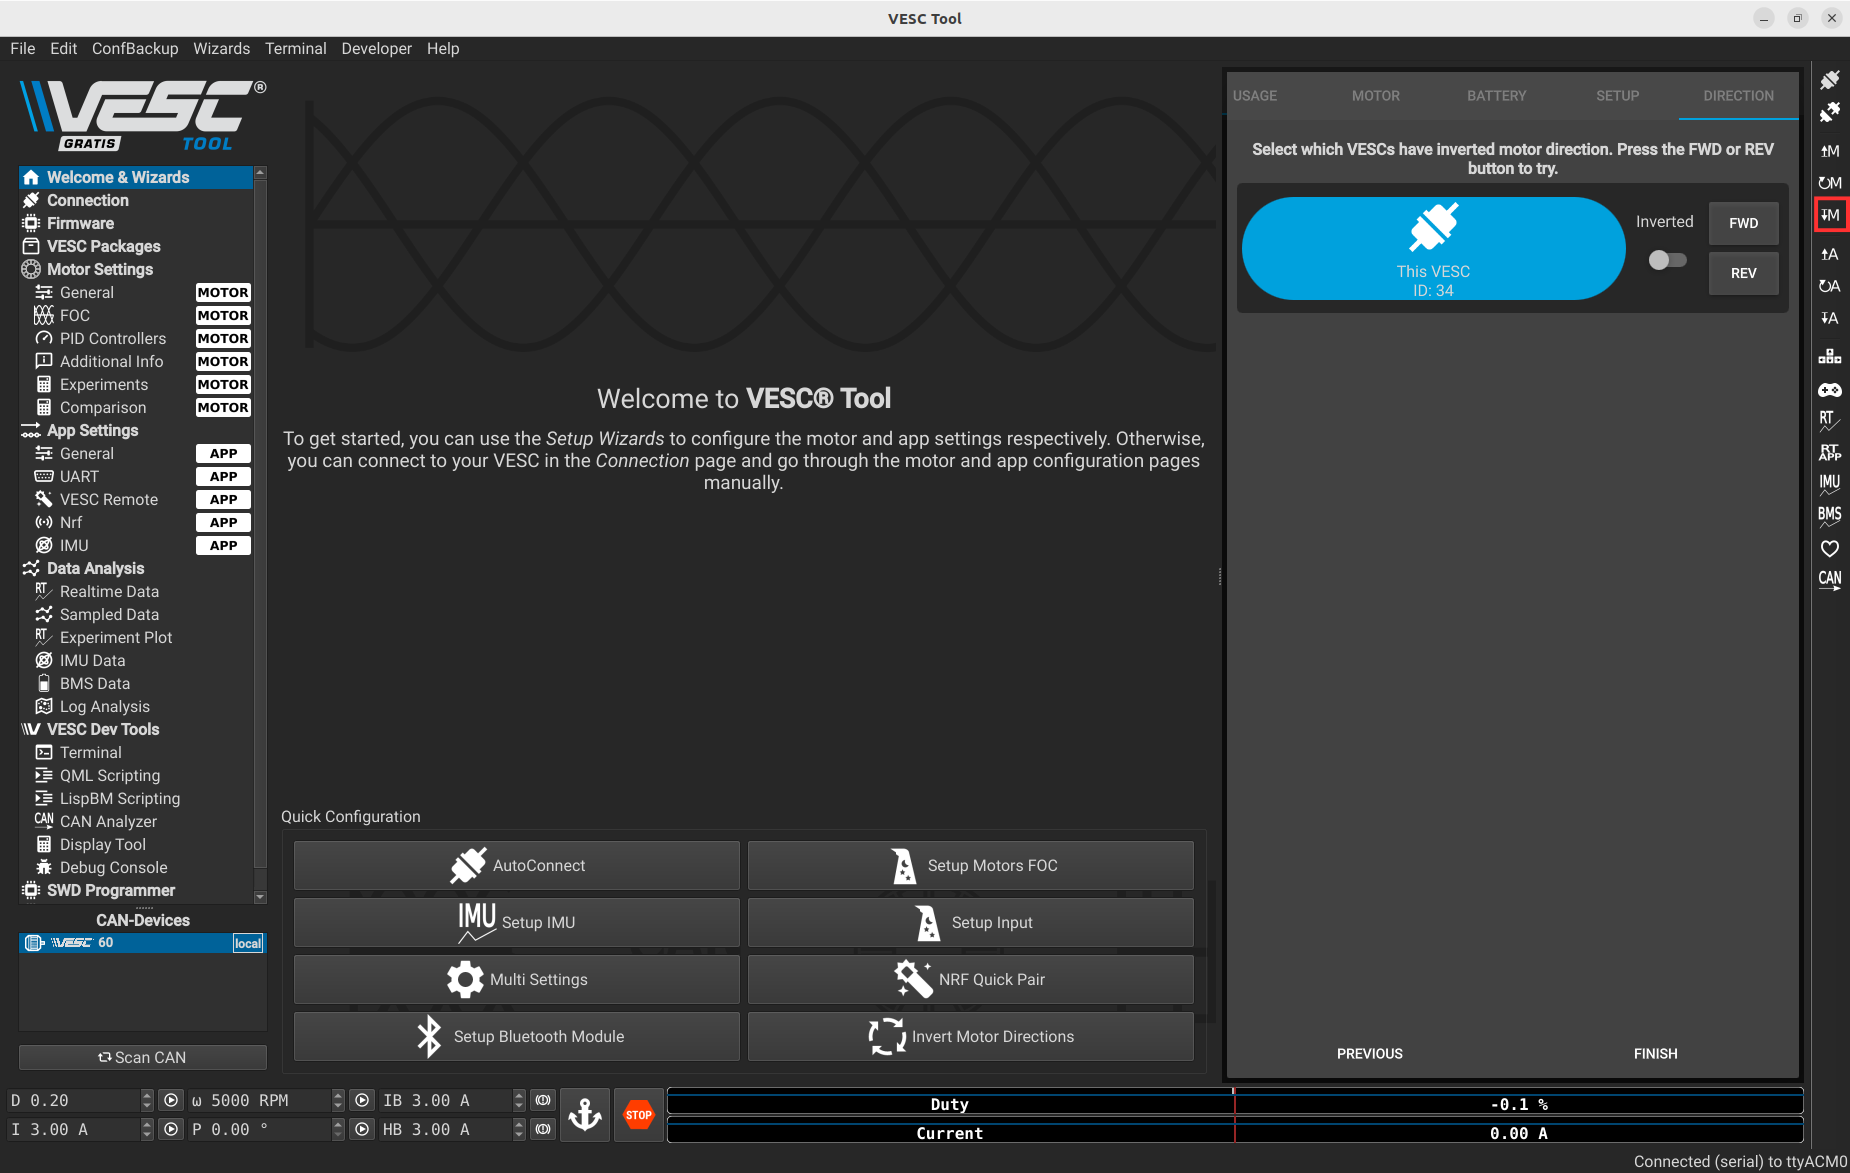
To test if the motor is usable with the VESC, press the following button and then use your keyboard arrow keys.
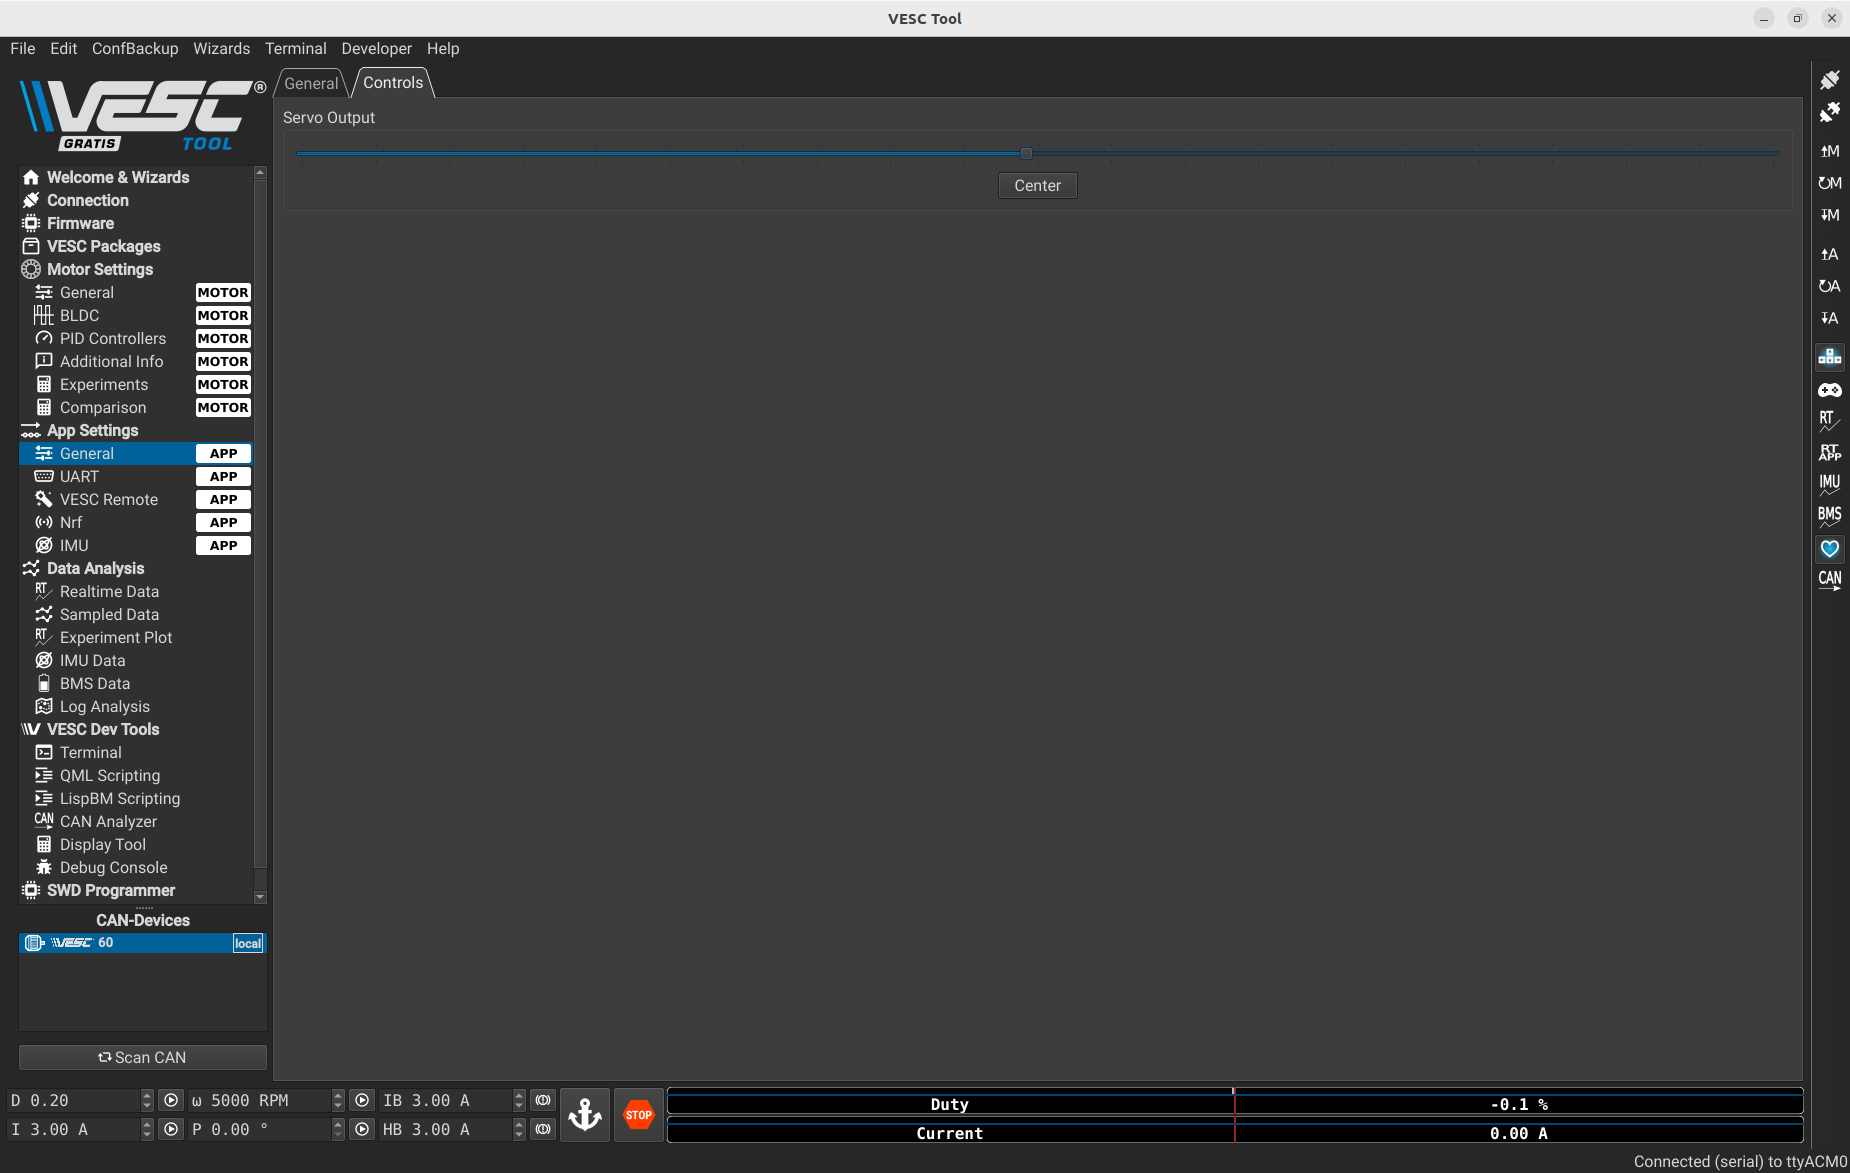
3.2.5 Servo Setup
To setup the servo motor:
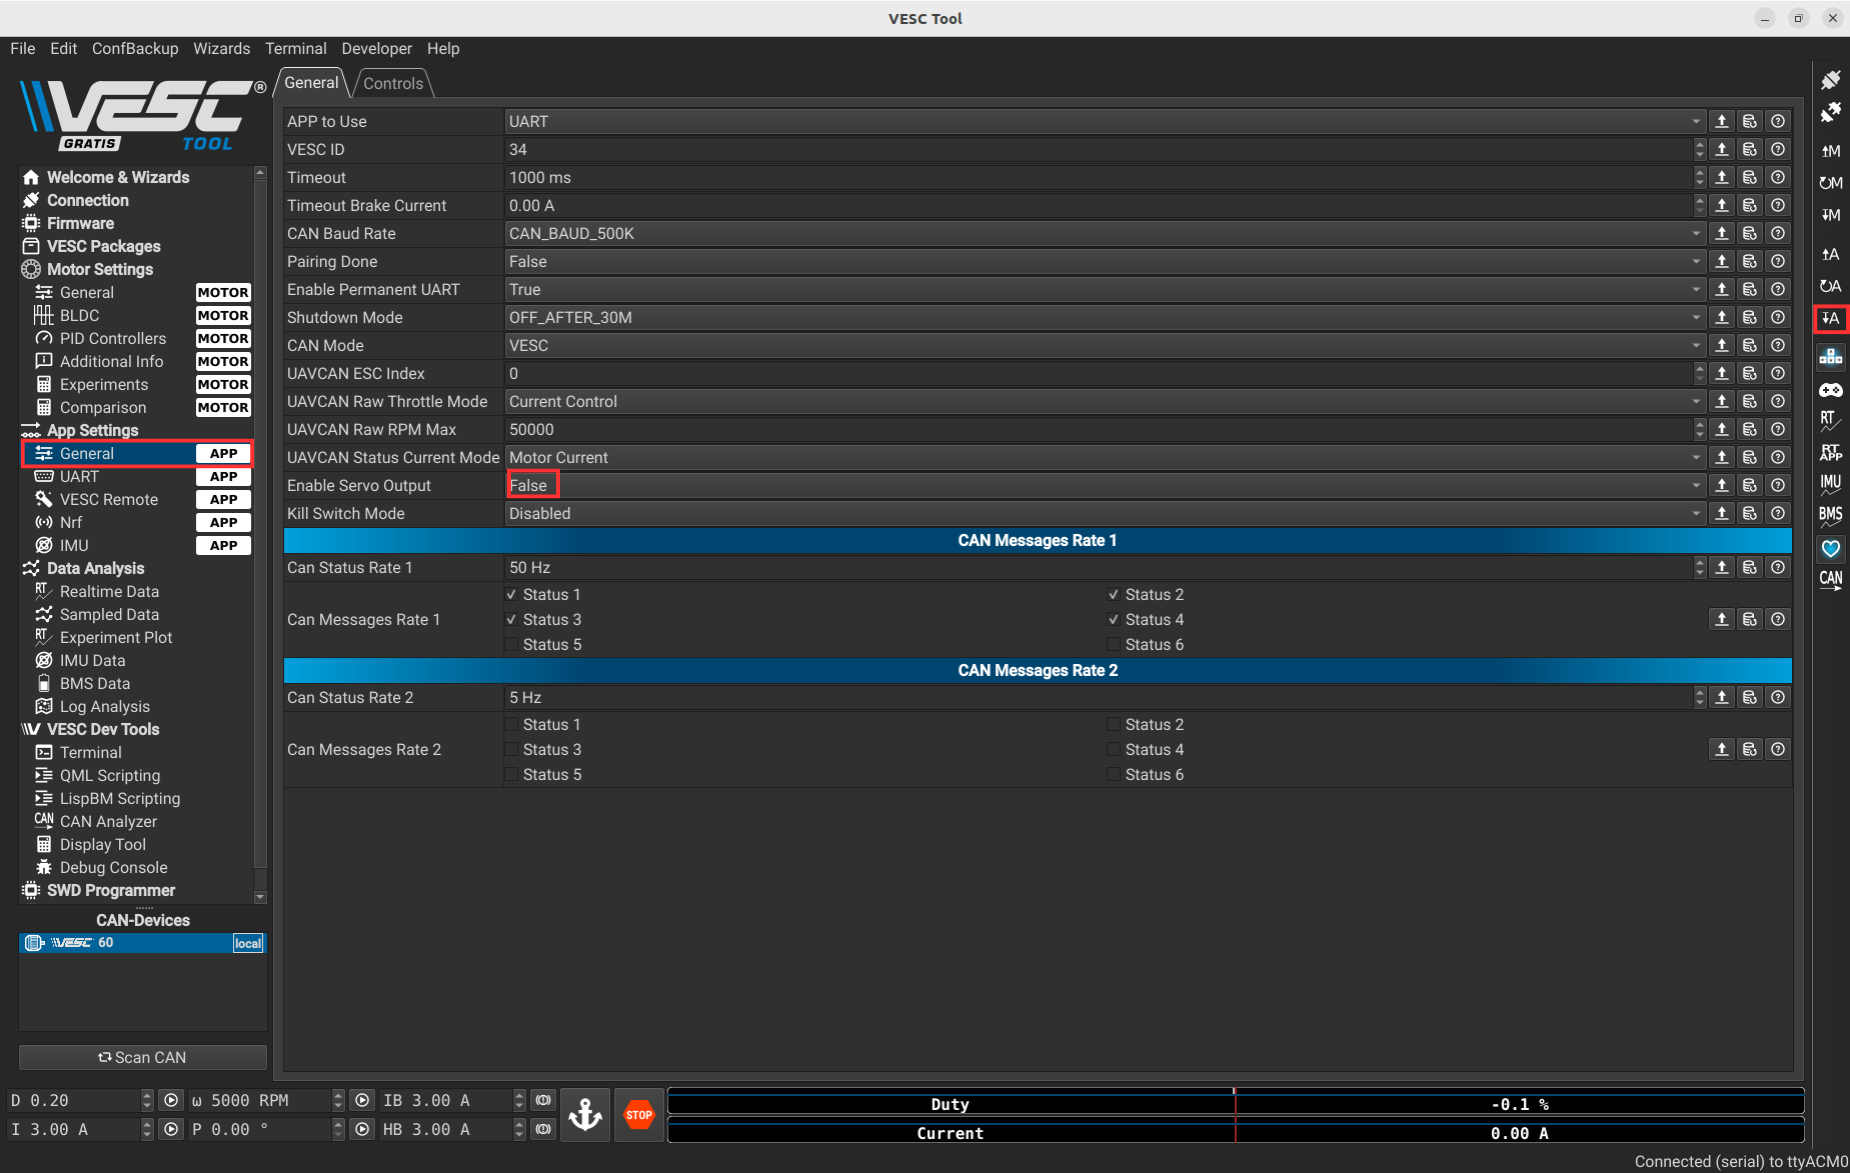
- Go to App Settings > General
- Set Enable Servo Output to
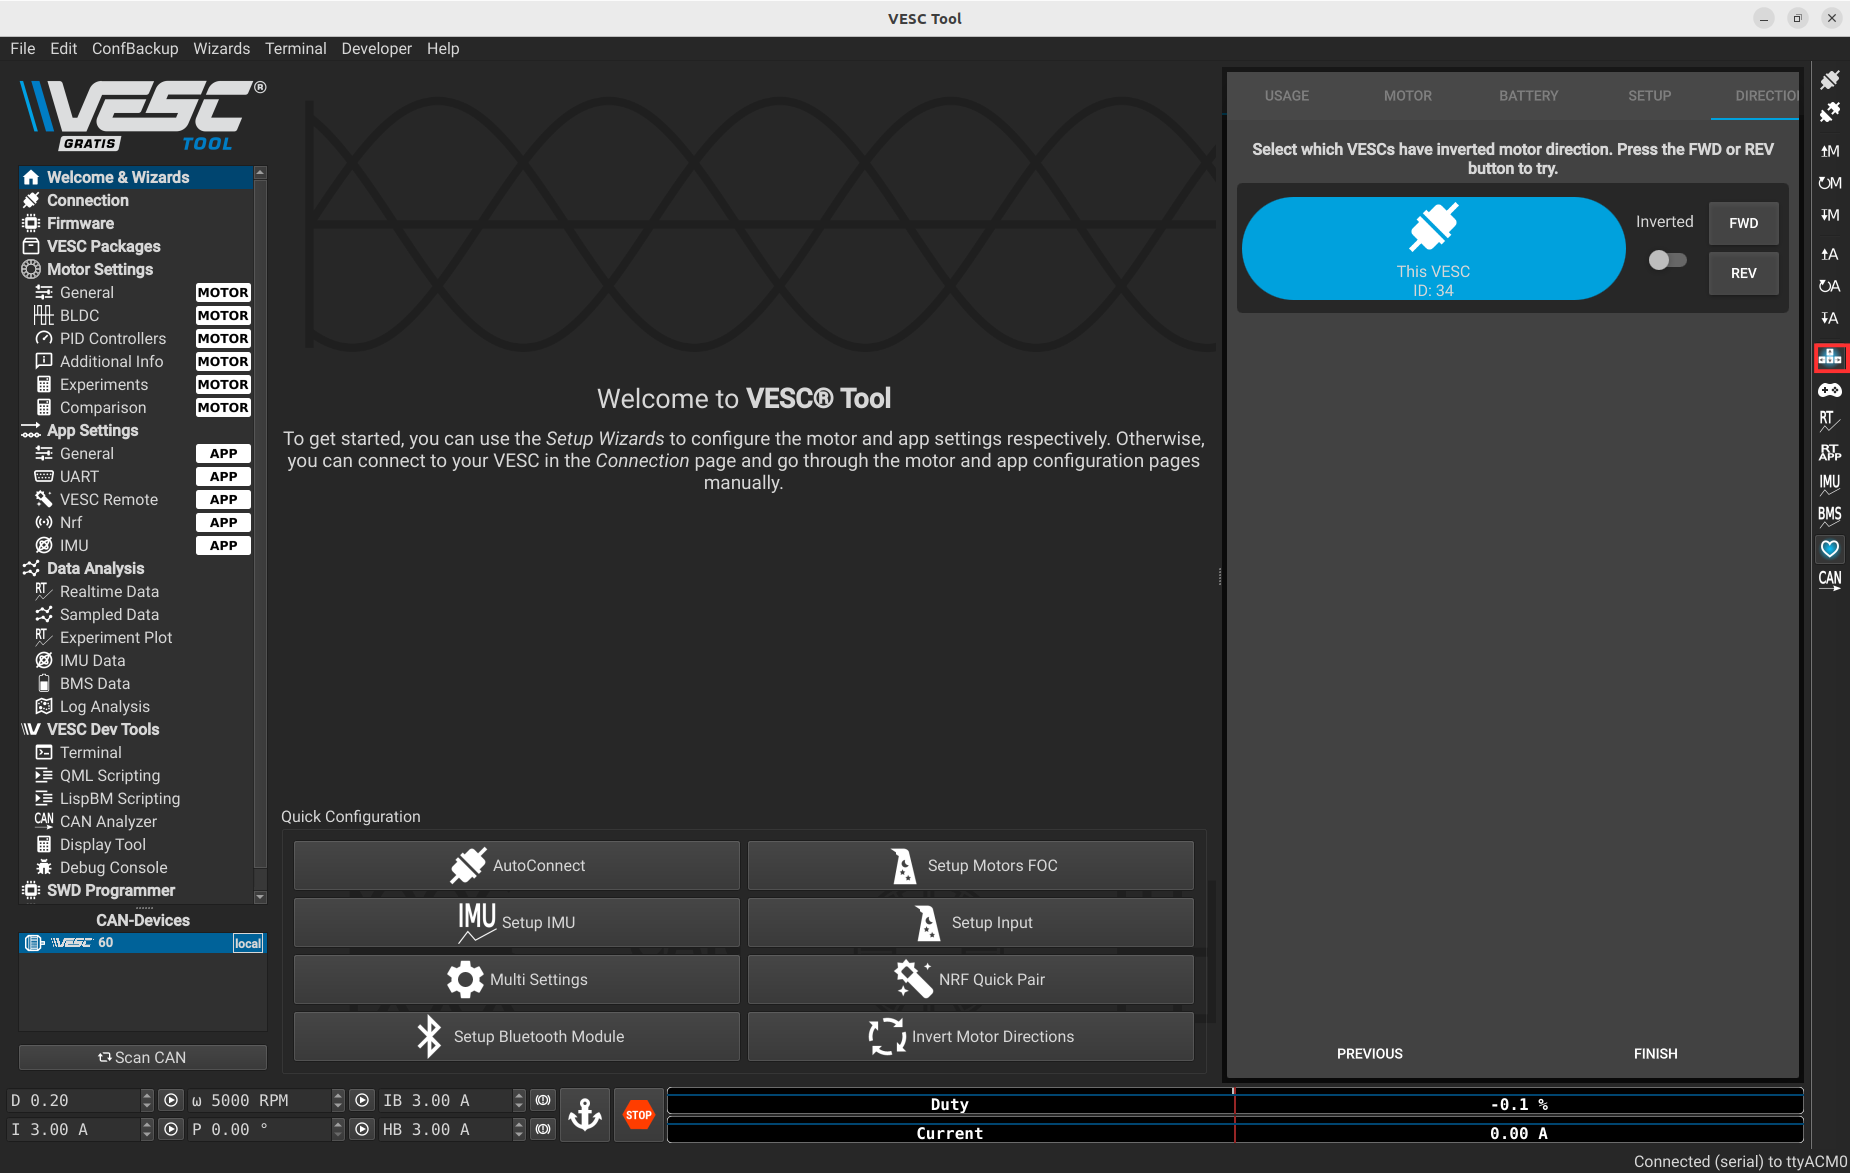
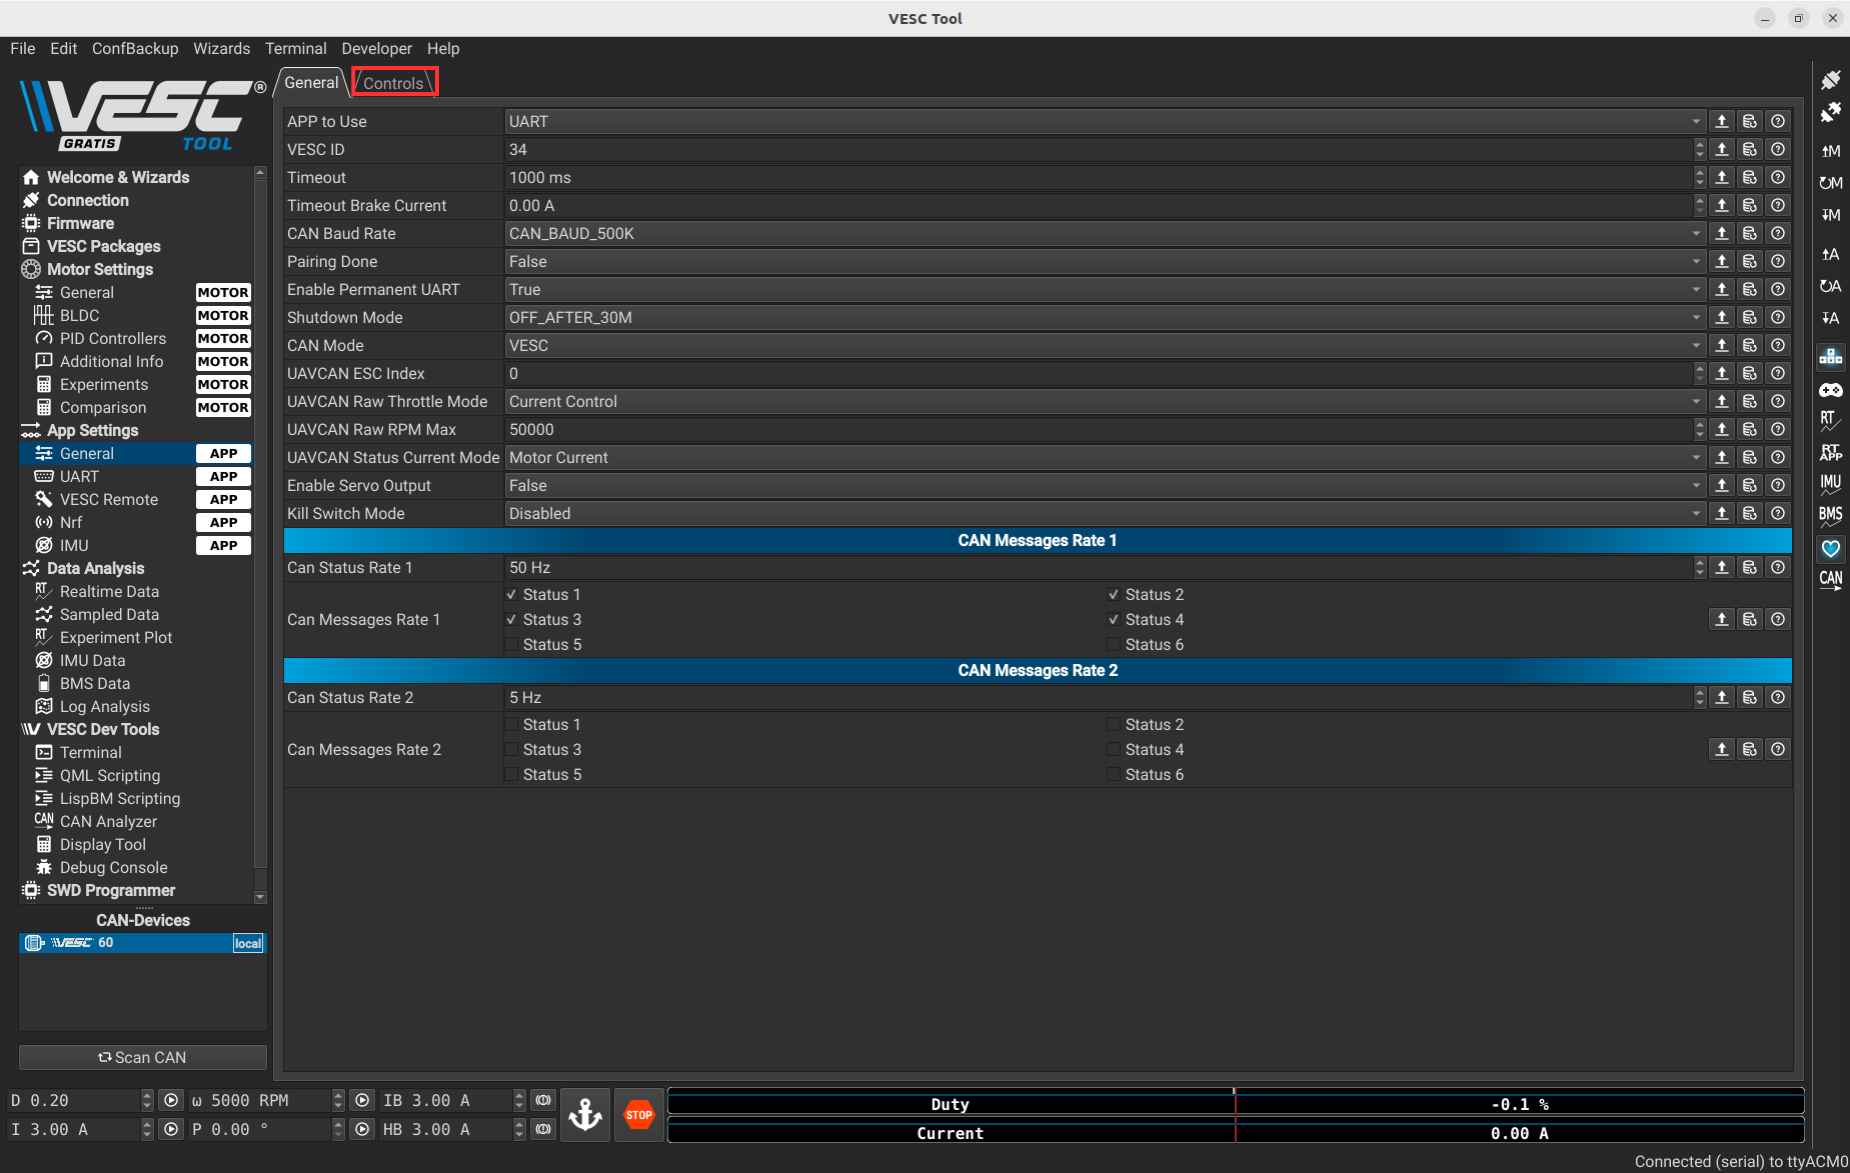
true - Press the following button on the right of the image
After that, you can test in the following tab.
Once you are on this page, you can test by moving the cursor.
4. Python Development with pyvesc
pyvesc is a Python library that allows direct communication with the VESC over USB or UART using the official VESC protocol. This enables scripting motor and servo control using Python — ideal for robotics and automation.
4.1 Installation
To use pyvesc, install the required packages:
pyvesc(VESC protocol encoder/decoder)pyserial(USB serial communication)
Install them using pip:
pip install git+https://github.com/LiamBindle/PyVESC.git
pip install pyserial
4.2 Serial Connection
To communicate with the VESC, create a serial connection using the serial.Serial function.
- On Linux, the port is usually
/dev/ttyACM0 - On Windows, it may be something like
COM3
Example:
from pyvesc import VESC
import serial

vesc = VESC(serial_port=serial.Serial('/dev/ttyACM0', baudrate=115200, timeout=0.1))
print("Connected to VESC. Firmware version:", vesc.get_firmware_version())
vesc.stop_heartbeat()
4.3 Set Motor Duty Cycle
You can control motor speed using duty cycle commands.
from pyvesc import VESC
import time

with VESC(serial_port='/dev/ttyACM0') as motor:
    motor.set_duty_cycle(0.1)  # 10% power forward
    time.sleep(2)
    motor.set_duty_cycle(0.0)  # Stop
4.4 Set Servo Position
To control a servo using the VESC’s PWM output:
from pyvesc import VESC
import time

with VESC(serial_port='/dev/ttyACM0') as motor:
    motor.set_servo(0.0)  # Min position
    time.sleep(1)
    motor.set_servo(1.0)  # Max position
    time.sleep(1)
    motor.set_servo(0.5)  # Center
⚠️ Ensure “Enable Servo Output” is set to
truein VESC Tool as shown in section 3.2.5.
4.5 Recommendations and Tips
- Always elevate the vehicle before sending commands
- Make sure the USB port is accessible and not blocked by OS permissions
- On Linux, add your user to the
dialoutgroup if needed - Always call
ser.close()when your script ends
For advanced use, such as reading telemetry (voltage, RPM, current), refer to the official pyvesc documentation: https://github.com/LiamBindle/PyVESC
5. Notes
To contribute improvements or report issues with this calibration guide, please use the GitHub repository’s issues tab or submit a pull request.
The improved styling includes better spacing, more color accents, and enhanced readability for all content elements.